The good news: you don’t need a full woodshop or years of experience to join the trend. You can ride this wave of woodworking love with simple, safe, beginner‑friendly projects that use basic tools and scrap wood. Think of this as the approachable, at‑home version of those viral masterpieces: less “museum piece,” more “I actually use this every day.”
Below are five practical, step‑by‑step DIY wood crafts that almost anyone can try—no fancy equipment, no perfect skills required. Just a willingness to start and a little patience.
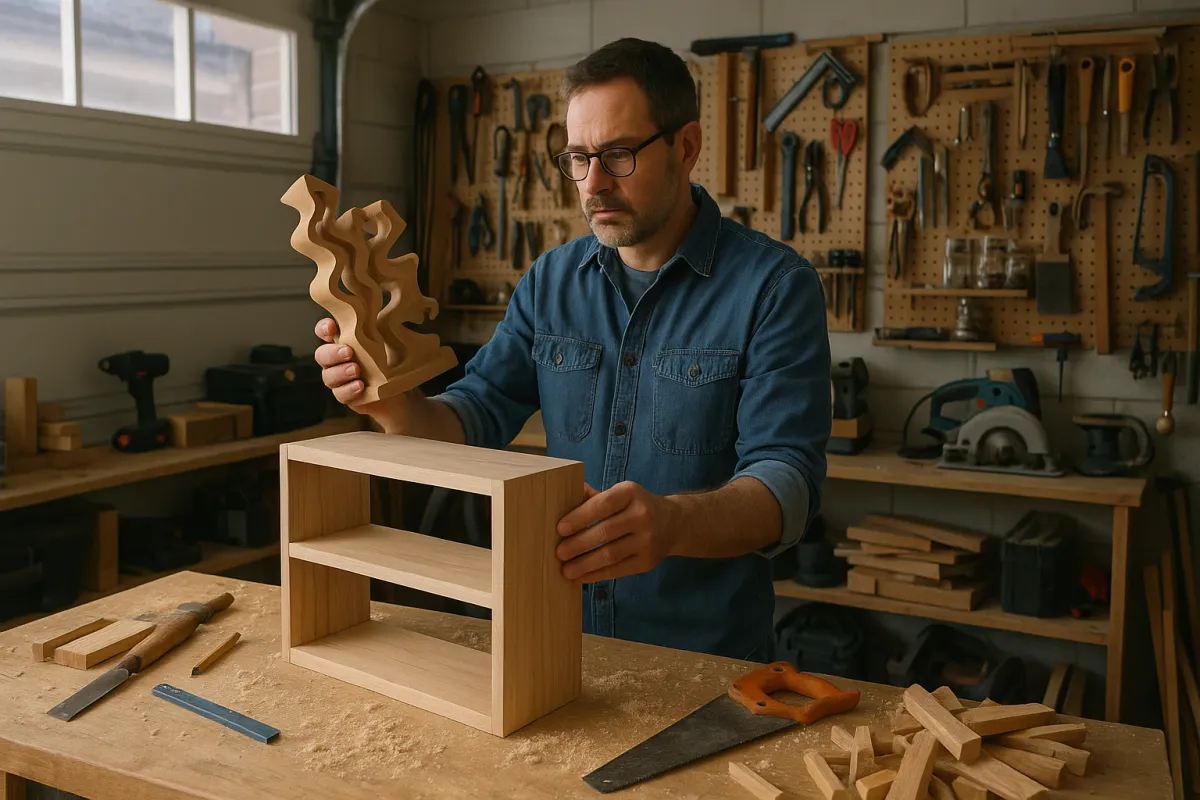
Scrap‑Wood Phone Stand Inspired by Viral Desk Setups
All those dreamy woodworking photos usually include a perfectly organized desk with custom wooden stands. You can make your own with just a small off‑cut of wood and a hand saw.
You’ll need:
- A small piece of wood (about 3–4" wide, 6–7" long, at least ½" thick)
- Handsaw (or small pull saw)
- Sandpaper (80, 120, 220 grit if possible)
- Pencil and ruler
- Optional: wood finish (mineral oil, beeswax, or clear polyurethane)
Steps:
Mark your slot:
Lay your phone on the wood to estimate width. Mark a line across the short side of the wood, about 1½" from one end. The slot should be slightly wider than your phone plus its case.
Set the angle:
Draw your slot line at a slight angle, leaning back about 10–15 degrees. This gives your phone a comfortable viewing angle (just copy the angle of a book propped on a table).
Cut the slot:
Use your saw to cut along the two long sides of the slot, about ½" deep. Make several cuts within the slot area, then use the saw or a flat screwdriver to gently break out the thin strips between cuts.
Clean and smooth:
Wrap sandpaper around a scrap of wood or an old gift card and sand inside the slot until it’s smooth and your phone fits easily.
Shape the edges:
Round off the corners and edges of the base with sandpaper. Start with coarse grit (80), then move to 120 and 220 for a softer, more “finished” feel.
Finish for protection:
Wipe off dust, then rub on a food‑safe oil or wax, or brush on a clear finish. Let dry fully.
Encouragement:
The first cut doesn’t have to be perfect. If your slot is too wide, add a thin strip of felt or fabric inside and call it a design choice. You’ve just made a custom wooden accessory like the ones going viral—only yours actually fits your phone.
Simple Wall Ledge Shelves for Displaying Mini “Art Pieces”
Those incredible carvings trending online look amazing on clean, floating shelves. You can recreate the vibe with slim, minimalist ledges that hold photos, plants, or small crafts—using just a board and a few screws.
You’ll need:
- 1×3 or 1×4 board (pine or poplar are beginner‑friendly)
- Saw (hardware stores can often cut for you if you don’t have one)
- Drill and screws (1½–2")
- Wall anchors (if not screwing into studs)
- Level and pencil
- Sandpaper and optional paint or stain
Steps:
Plan your length:
Decide how wide you want your shelf (2–3 feet is a great starter size). Cut your board or have it cut at the store.
Smooth it out:
Sand all edges and faces until they’re smooth to the touch. Knock off any sharp corners.
Mark your wall:
Hold the board where you want it on the wall. Use a level to make sure it’s straight, then lightly trace a line along the top edge.
Mark screw positions:
Mark 2–3 spots along that line where screws will go (avoid just the very ends). If you can find studs, mark those. If not, plan to use wall anchors.
Pre‑drill the wood:
Pre‑drill holes in your board where the screws will go to prevent splitting.
Prep the wall:
If using anchors, drill holes at your wall marks and insert the anchors.
Attach the shelf:
Hold the board against the wall, line it up with your top line, and drive screws through the board into the studs/anchors.
Finish if desired:
You can take the shelf down to paint or stain it first, or paint it in place with painter’s tape along the wall edges.
Encouragement:
Your first shelf might not be showroom‑perfect, but it will be straight enough to hold your stuff. And once it’s covered in plants, photos, or small carvings, no one will be inspecting the screw heads.
Hand‑Carved Wooden Butter Spreader (Your First Carving Project)
Those intricate carved animals and scenes going viral are built on basic carving skills. A butter spreader or small cheese knife is an easy, low‑risk way to start learning the feel of cutting wood.
You’ll need:
- A small piece of soft hardwood (like basswood, birch, or even a paint stir stick)
- A sharp carving knife or whittling knife
- Sandpaper (120, 220)
- Food‑safe oil (mineral oil, coconut oil, or cutting board oil)
- Optional: cut‑resistant glove or thick leather gardening glove
Steps:
Draw the shape:
Sketch a simple knife or spreader shape on your piece of wood: rounded handle, flat “blade” that’s about 1" wide and 4–5" long.
Rough out the outline:
Carefully carve away the corners and excess wood outside your sketch. Use small, controlled cuts, always pushing the knife away from your hand or carving off to the side.
Shape the handle:
Round the handle so it’s comfortable to hold. Think “smooth twig” rather than “perfect cylinder.” Imperfections are part of the charm.
Thin the blade end:
Gently shave the “blade” section to be thinner and slightly curved. You want it strong, but thin enough to spread butter or soft cheese easily.
Fine‑tune with sanding:
Once the shape feels right, sand the entire piece until smooth, starting with 120 grit and finishing with 220. Take extra care around any corners or ridges.
Oil and cure:
Rub in a food‑safe oil, let it soak in for 15–20 minutes, then wipe off the excess. Repeat as needed until the wood looks rich and feels sealed.
Encouragement:
Every nick and wobble in your first carving tells the story of you learning. The people creating those show‑stopping carvings started with something this simple—your butter spreader is a legit first step into that world.
Wood‑Block Art Using Simple Geometric Shapes
A lot of trending woodworking pieces play with texture, angles, and repetition—like 3D wall art made from dozens of tiny blocks. You can create a beginner version that still looks modern and intentional, perfect for a shelf or small wall space.
You’ll need:
- Small wood blocks or cut‑up scraps (1–2" squares/rectangles)
- Wood glue
- A flat backing board (plywood, MDF, or even a solid cardboard panel for very lightweight pieces)
- Sandpaper
- Paint, stain, or leftover wall paint
- Optional: painter’s tape for clean color blocks
Steps:
Plan your pattern:
Lay your blocks on the backing board without glue. Try alternating heights, rotating the grain, or arranging in simple patterns (diagonal stripes, checkerboard, etc.).
Sand as needed:
Smooth rough edges so they’re not splintery, but don’t stress about perfection. Slightly uneven surfaces add texture.
Pre‑color some pieces (optional):
Paint or stain a few blocks in different tones (natural wood + white + one accent color looks great). Let them dry fully.
Glue it down:
Starting from one corner, glue each block to the backing board. Press firmly and wipe away any squeeze‑out glue with a damp cloth.
Add layers:
If you want depth, glue some blocks on top of others after the first layer dries, creating a subtle 3D effect.
Finish edges:
Once dry, lightly sand any rough spots and touch up paint or stain if needed. You can leave the backing raw or paint it a solid color.
Hang or display:
Attach a simple hook or picture‑hanging strip to the back, or lean your art on a shelf.
Encouragement:
Abstract wood art is very forgiving. If a block sits slightly crooked, it looks intentional. This is an easy way to echo the geometric designs you’re seeing online without needing precision tools.
No‑Power‑Tools Wooden Candle Holder (Using Pre‑Cut Wood)
Many of the viral woodworking pieces rely on big tools, but you can still work with real wood using pre‑cut parts and basic hand tools. A simple wooden candle holder gives you that warm, carved‑wood look with very little risk.
You’ll need:
- Pre‑cut wood slices, small boards, or craft wood blocks (from a craft store or online)
- Drill with a Forstner bit or spade bit sized for tea lights (usually ~1½")
- Sandpaper
- Wood finish (oil, wax, or stain + clear coat)
- Tea light candles or LED tea lights
- Optional: masking tape and paint for pattern details
Steps:
Choose your base:
A flat wood slice, a short 2×4 off‑cut, or a rectangular craft block all work well. Make sure it sits flat on a surface.
Mark candle positions:
Decide if you want one, two, or three candles in a row. Mark the center of each circle with a pencil.
Drill the recesses:
Using the appropriately sized bit, drill down just deep enough so the metal or plastic cup of the tea light sits mostly below the surface, but the flame stays above the wood.
Sand thoroughly:
Smooth the entire piece, especially around the drilled holes, to remove splinters and sharp edges.
Add design details (optional):
Use masking tape to create simple stripes or geometric shapes. Paint those sections, let dry, then remove the tape for crisp lines.
Seal the wood:
Apply your chosen finish. For real flame candles, avoid thick, sticky finishes near the opening and never leave candles burning unattended. LED tea lights are the safest option.
Test and style:
Pop in your tea lights and test the fit. Place your holder on a heat‑resistant surface away from fabric or plants.
Encouragement:
This project gives you that “I made it myself from real wood” feeling without needing a full workshop. When people ask where you bought it, you get to say, “Actually… I made it.”
Conclusion
The woodworking projects going viral right now prove one thing clearly: simple materials can become something special in the right hands. You might not be carving cathedral‑level sculptures yet, but every phone stand, shelf, spreader, art panel, and candle holder you make is a real step toward that kind of skill.
Start where you are, with what you have. Pick one of these projects, give yourself an hour, and let “good enough for today” be your goal. The more you make, the more your confidence—and your craftsmanship—will quietly level up in the background.
And if you do try one, snap a photo and share it. The internet loves incredible woodworking, but it also needs more honest, in‑progress, “I actually made this” projects from real people like you.