1. Create a Grab-and-Go Entry Station (So You Stop Losing Your Keys)
If your keys, bags, and mail land in random spots, your entryway can transform your whole day—for better or worse. A simple, intentional “landing zone” can cut morning stress and mess in under an hour.
What you’ll need:
- 3–6 wall hooks or a small hook rack
- A small tray, shallow basket, or dish
- Optional: command hooks or screws and anchors
- Optional: a small wall shelf or floating shelf
Step-by-step:
- Pick your exact drop spot.
Stand where you normally enter the house. That first stretch of wall or a small surface nearby is ideal.
- Define jobs for the space.
Decide what must live here: keys, everyday bags, mail to process, dog leash, umbrellas. The clearer you are, the less clutter piles up.
- Hang hooks at realistic heights.
Use command hooks if you’re renting or not ready to drill. Place them where your hand naturally reaches when you walk in—usually between chest and shoulder height.
- Add a tray for small items.
Put a tray or shallow basket on a console, shoe cabinet, or wall shelf. This becomes the home for keys, sunglasses, and headphones. “Everything in its place” starts with giving things a place.
- Set a simple rule.
Each time you walk in the door, hang your bag and drop keys in the tray before doing anything else. For families, teach one rule: “Keys and bags live by the door.”
2. Build a Low-Stress Tool Kit from What You Already Own
You don’t need a full workshop to handle everyday fixes. A small, well-thought-out tool kit saves time, money, and frustration when something breaks or needs hanging.
What you’ll need:
- Small box, tote, caddy, or sturdy shoebox
- What you already have: tape measure, screwdriver, scissors, flashlight, etc.
- Optional extras: picture-hanging kit, level, utility knife, assorted screws and nails
Step-by-step:
- Gather scattered tools.
Walk through your home and collect every “handy” item: screwdrivers, tape, nails, extra hooks, Allen keys from old furniture, etc. Put everything on a table.
- Sort into “always useful” vs. “maybe someday.”
Keep daily heroes:
- Phillips and flathead screwdrivers
- Tape measure
- Hammer (or rubber mallet)
- Sturdy scissors
- Flashlight or headlamp
- Small assortment of nails/screws
- Choose a dedicated container.
Any box or tote works as long as it’s easy to carry and clearly identifiable. Label it “TOOLS” with tape and marker so everyone knows where to put things back.
- Create mini-kits inside.
Use small jars, zip bags, or snack containers to group items:
- “Picture hanging” (hooks, nails, wall anchors)
- “Furniture” (Allen keys, spare screws)
- “Sticky stuff” (tapes, felt pads, command strips)
- Store it where you’d actually look first.
A hallway closet or under the kitchen sink is better than the garage if that’s where you usually search. Consistency beats the “perfect” location.
3. Refresh a Tired Room with a 1-Wall Focus Project
Repainting a whole room can feel overwhelming. Focusing on a single wall gives you a big visual upgrade with a lot less work, cost, and decision fatigue.
What you’ll need (choose your style):
- For a painted accent wall: painter’s tape, roller, brush, paint tray, and paint
- For a “feature” wall without paint: removable wallpaper, peel-and-stick planks, or framed art/photos
Step-by-step (paint version):
- Pick the wall that already draws attention.
Usually the wall behind your bed, sofa, or TV. This becomes your “wow” wall.
- Choose a color that plays nice.
Look at what’s already in the room: sofa, bedding, rug. Pick a color that appears somewhere in those items (even in a pillow pattern) for instant cohesion.
- Prep more than you think you need to.
Move furniture away, wipe the wall with a damp cloth, and tape off baseboards and outlets. Put down an old sheet or drop cloth.
- Cut in, then roll.
Use a brush to paint around edges and outlets first (called “cutting in”). Then use a roller for the main sections. Two thinner coats usually look better than one thick one.
- Style it simply.
Once dry, add 1–3 items that “talk” to the wall: a throw pillow in a matching shade, a piece of art that includes that color, or a plant to soften the contrast.
Step-by-step (no-paint version):
- Start with a clean, empty surface.
Take down old art or shelves so you see the wall as a blank canvas.
- Choose a pattern or layout.
- Removable wallpaper for maximum impact
- Three large matching frames in a row
- A grid of 6–9 smaller frames
Lay it out on the floor first.
- Use temporary hanging solutions if you rent.
Removable strips and hooks protect walls. Follow weight limits and clean the surface first so things actually stay put.
- Hang at eye level.
Aim for the center of your art to be around 57–60 inches from the floor, or roughly eye height for most people.
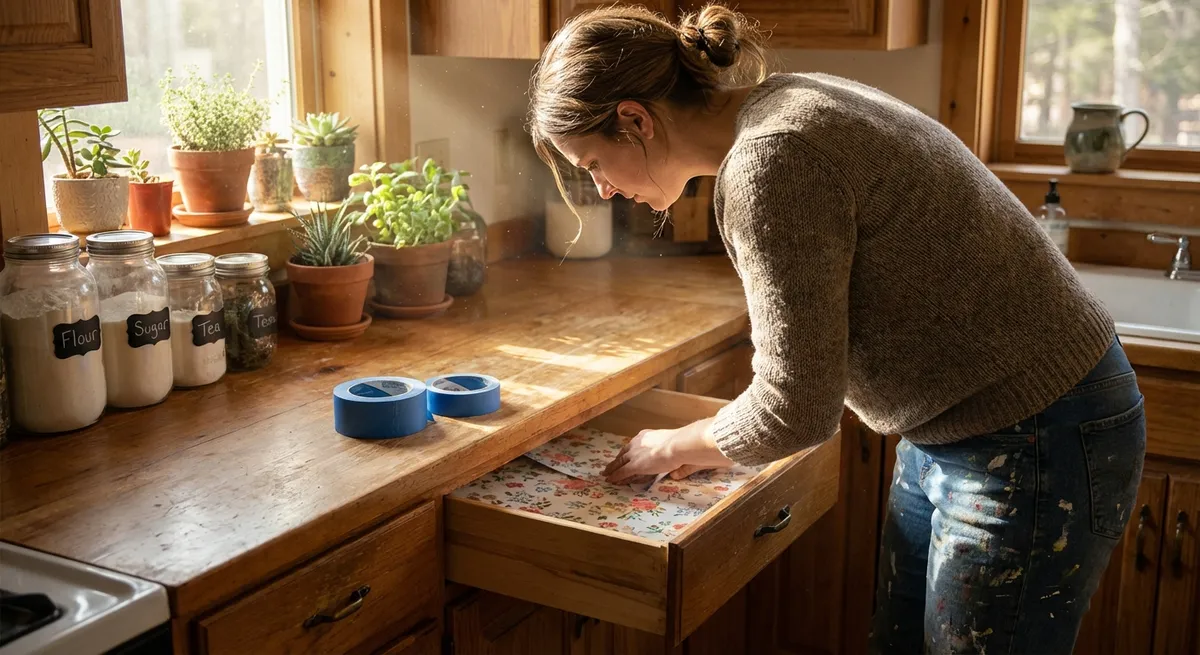
4. Upgrade a Drawer You Use Every Day (The “Tiny Zone” Makeover)
Instead of organizing your whole kitchen, focus on one single drawer you touch constantly—cutlery, cooking tools, office supplies, bathroom drawer, or nightstand. A 20–30 minute “tiny zone” makeover feels surprisingly life-changing.
What you’ll need:
- Trash bag and recycling bag
- Small containers: empty food tubs, boxes, or inexpensive drawer organizers
- Damp cloth for cleaning
Step-by-step:
- Dump it completely.
Take everything out of the drawer and place it on a surface. Seeing the full pile is motivating and clarifying.
- *Decide what this drawer is for.
One sentence only, like: “Everyday cooking tools” or “Bedtime essentials” or “Bills and pens.” If it doesn’t fit the sentence, it doesn’t belong.
- Do a quick, honest sort: keep, relocate, toss.
- Keep: used weekly or essential to the drawer’s purpose
- Relocate: useful, but belongs elsewhere
- Toss/recycle: broken, expired, or duplicates you never use
- Clean the empty drawer.
Wipe the inside and let it dry. It’s faster than you think and makes the “after” feel dramatic.
- Add simple dividers.
Use what you have: small boxes, lids, or food containers become sections. Group similar items together (all pens in one, all batteries in another).
- Put back only what earns its spot.
Ask: “Do I want to see and reach for this regularly?” If not, it goes elsewhere. You don’t need to keep the drawer full; you need it to be clear.
5. Create a Cozy Lighting Layer with What You Already Own
Overhead lights can make rooms feel harsh and unfinished. Adding a few softer, lower light sources instantly makes your space feel warmer and more welcoming—without rewiring anything.
What you’ll need:
- Any lamps you already own (table, floor, or clip-on)
- Warm white bulbs (around 2700–3000K color temperature is cozier)
- Extension cord or power strip if needed
- Optional: smart plugs or timers
Step-by-step:
- Choose one room to improve.
Living room, bedroom, or workspace. Don’t try to do the whole house at once.
- Gather all your spare lamps.
Pull them from closets, spare rooms, or mismatched corners. You can always rearrange later.
- Check and swap bulbs.
If they’re too bright or cold/blue, switch to warm white bulbs. Lower wattage or “soft white” often feels much more relaxing.
- Place lights at different heights.
- One floor lamp behind or beside seating
- One table lamp on a side table or dresser
- Optional: a small lamp on a shelf or nightstand
The goal is gentle pools of light, not one bright spotlight.
- Create a simple “evening setup” habit.*
In the evening, turn off the harsh ceiling light and turn on your lamp combo instead. If you add a timer or smart plug, your cozier lighting can turn on automatically.
Conclusion
Home projects don’t have to mean sawdust and blueprints. They can be one shelf, one wall, one drawer, or one light at a time. When you choose a project that fits your energy and follow clear, simple steps, you build more than a nicer home—you build trust in your ability to change your own space.
Pick just one of these five ideas to start this week. Finish it fully, enjoy the result for a few days, and then come back for the next one. Small wins stack up faster than you think.
Sources
- [U.S. Department of Energy – Lighting Choices to Save You Money](https://www.energy.gov/energysaver/lighting-choices-save-you-money) - Explains bulb types, color temperature, and how lighting affects comfort and energy use
- [Mayo Clinic – Light and Your Health](https://www.mayoclinic.org/healthy-lifestyle/adult-health/in-depth/light-therapy/art-20048298) - Discusses how light influences mood and sleep, helpful when planning cozy lighting
- [Cornell University – Workspace Ergonomics](https://ergo.human.cornell.edu/ergoguide.html) - Offers guidance on practical setups for work areas, relevant when creating entry stations and tool storage
- [This Old House – Basic Toolbox Essentials](https://www.thisoldhouse.com/tools/21017709/10-tools-every-homeowner-should-have) - Provides an expert-backed list of core tools for simple home projects
- [HGTV – Accent Wall Ideas](https://www.hgtv.com/design/decorating/color/accent-walls-pictures) - Shows different ways to use a single wall for a big visual impact without a full-room makeover