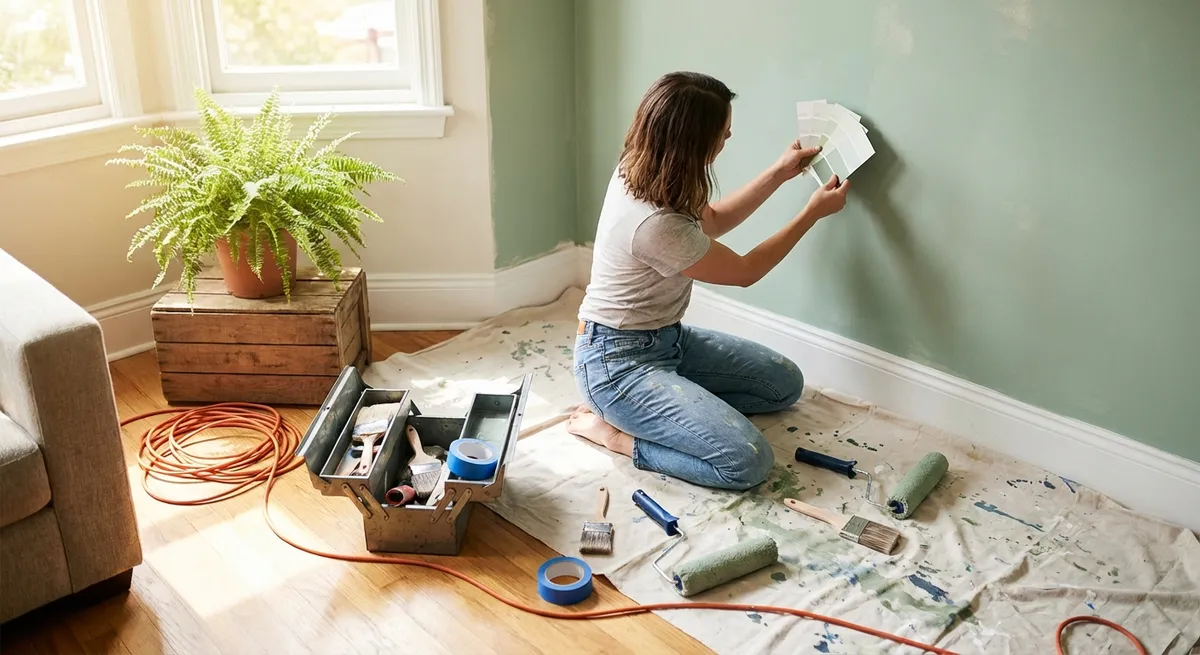
Below are five approachable DIY tips designed for real life—small spaces, limited time, and everyday budgets. Pick one, start where you are, and let each small win move you to the next.
Tip 1: Create a “Home Toolkit Starter Box”
Before you tackle any project, having basic tools in one place makes everything easier. Instead of buying everything at once or getting overwhelmed by endless tool lists, build a simple starter kit that fits in a shoebox or small tote.
Step-by-step:
Pick a container
Use a shoebox, small bin, or sturdy tote with a handle. The goal is “grab and go,” so you’re not searching for tools every time.
Start with the real essentials
Look for a basic, good-quality version of each: - Measuring tape (16 ft or 25 ft) - Screwdriver with interchangeable bits (flathead + Phillips) - Hammer - Utility knife - Pliers (slip-joint or needle-nose) - Assortment of screws, nails, and wall anchors in a small box
Add safety basics
- Work gloves - Safety glasses - Simple dust mask if you’ll be sanding or drilling
Label everything
Use painter’s tape and a marker to label: “Tools – Do Not Scatter.” This sounds small, but it helps prevent tools from getting absorbed into junk drawers.
Store it in an obvious place
Hall closet, under the bed, or beside the cleaning supplies. The easier it is to reach, the more likely you’ll use it.
Why this matters: Once you have a reliable toolkit, every other project feels less intimidating. You’re not “someone who doesn’t know where anything is”—you’re the person with the toolkit ready to go.
Tip 2: Fix the Wobbly Chair (or Table) That’s Been Annoying You
That wobbly chair, side table, or stool is a perfect “skill builder” project: small, low-risk, but very satisfying when you’re done.
Step-by-step:
Test where the wobble is coming from
Place the furniture on a flat surface and gently rock it. Watch which leg lifts off the ground. That’s your main trouble spot.
Tighten existing screws or bolts
- Flip the furniture over carefully. - Use a screwdriver or Allen wrench to tighten any loose hardware. - Don’t overtighten—go until it’s snug, then test again.
Add wood glue if it’s a loose joint (for wooden furniture)
- If a joint wiggles, gently pull it apart slightly. - Add a small amount of wood glue into the joint. - Press it back together firmly. Wipe away any squeezed-out glue with a damp cloth. - Wrap with a strap, belt, or painter’s tape to hold it steady while it dries (check glue instructions, usually 30 min–24 hrs).
Level uneven legs with felt pads
- For a small wobble, stick adhesive felt pads under the short leg. - Stack two pads if needed until the wobble disappears.
Do a final stability check
Set the chair or table upright and sit or press on it gently from different angles. If it’s solid, you’re done.
Encouragement: This project teaches you how furniture is put together and how to diagnose “loose vs. uneven”—skills you’ll use again and again.
Tip 3: Replace a Tired Shower Curtain and Deep-Clean the Rod Area
This is part décor upgrade, part low-effort cleaning win. You’ll improve the look of your bathroom and remove hidden grime in one quick project.
Step-by-step:
Choose a new curtain and liner
- Pick a fabric or vinyl curtain you actually like looking at. - Add a simple, inexpensive plastic liner if your main curtain isn’t waterproof.
Remove the old curtain and rings
- Take everything down, including the liner and rings or hooks. - If the rings are rusty or sticky, plan to replace them—basic plastic or stainless rings work well.
Clean the shower rod and nearby wall area
- Use a multipurpose cleaner or a mix of warm water and mild dish soap. - Wipe down the entire rod to remove soap scum and dust. - Wipe the area where the curtain usually touches the wall or tile—mildew often hides there.
Wash what you can reuse
- Many fabric curtains can go in the washing machine on gentle with mild detergent (check the tag). - Plastic liners can sometimes be cleaned with a sponge and baking soda, but if it’s heavily stained or moldy, it’s usually better to replace.
Hang the new curtain and adjust height
- Attach rings to the curtain and liner, then hang them together. - Set the rod height so the curtain just brushes the tub or shower threshold—this helps prevent water pooling on the floor but still allows airflow.
Encouragement: You just did a mini bathroom refresh and tackled a cleaning zone many people ignore. That’s a real, visible win.
Tip 4: Build a Simple Entryway Drop Zone to Cut Clutter
Instead of letting keys, mail, and bags explode across every surface, create one small “home base” near your front door. It doesn’t need to be fancy—just intentional.
Step-by-step:
Pick your spot
- Just inside the door is best: a wall, small corner, or side of a closet. - If space is tight, think vertical: wall hooks and a slim shelf.
Define the essentials
Ask: “What do I always toss down when I walk in?” Usually: - Keys - Wallet - Mail - Bag or backpack - Dog leash or sunglasses (optional)
Add simple organizing pieces
- Hooks for bags and coats (adhesive hooks if you’re renting). - Small tray or bowl for keys and loose change. - Vertical file or wall-mounted folder for incoming mail and papers. - Shoe mat or tray if shoes tend to pile up.
Set clear rules for yourself
- Keys live in the bowl. - Mail goes in the vertical file, not on the table. - Bag always hangs on the same hook. Keep it simple enough that you can follow it on a tired day.
Do a one-minute reset daily
Once a day (often when you lock the door at night), spend 60 seconds putting things back in their spots. That’s it.
Encouragement: You just created a small system that saves time, stress, and “Where are my keys?” panics. This is exactly how “organized homes” are built—one tiny system at a time.
Tip 5: Upgrade Lighting in One Room for Instant Mood Change
Lighting has a huge impact on how your home feels. Swapping one bulb type or adding a basic lamp can make a room feel cleaner, warmer, or more relaxing—with almost no tools.
Step-by-step:
Choose your target area
- A dim living room corner - A harshly lit bedroom - A too-bright home office
Decide the feeling you want
- Warm and cozy: aim for “soft white” (around 2700–3000K) bulbs. - Bright and focused: use “daylight” (around 5000K) bulbs. - Balanced general use: “warm white” or “bright white” (around 3000–4000K).
Check your existing fixtures and bulbs
- Turn off the light and let the bulb cool. - Remove it and check for bulb type (e.g., A19, BR30) and wattage equivalent. - Choose LED replacements to save energy and reduce heat.
Swap the bulbs safely
- Turn off the switch (and the breaker for hardwired fixtures if you’re cautious). - Remove old bulbs and install new ones snugly, but don’t overtighten. - Turn power back on and test.
Add one extra light source if needed
- A floor lamp for a dark corner. - A desk lamp for a workspace. - A small bedside lamp for reading instead of using a harsh ceiling light.
Encouragement: This is one of the fastest ways to make your home feel more “put together” and comfortable. You’ll start noticing where else a small lighting tweak could help—and now you know exactly how to do it.
Conclusion
Home projects don’t have to be overwhelming, expensive, or all-or-nothing. By starting with small, clear steps—building a simple toolkit, fixing one wobbly chair, refreshing a shower curtain, creating a drop zone, or improving a room’s lighting—you’re doing more than just “tidying up.” You’re learning how your home works and proving to yourself that you can change it, bit by bit.
Choose one tip from this list and complete it this week. Then notice how that one small change affects your day: fewer annoyances, less clutter, or a room that feels just a little more like you. That’s how real DIY confidence grows—one practical project at a time.
Sources
- [U.S. Department of Energy – LED Lighting](https://www.energy.gov/energysaver/led-lighting) – Explains LED bulb types, color temperatures, and energy savings for home lighting upgrades.
- [Family Handyman – Must-Have Tools for Homeowners](https://www.familyhandyman.com/list/must-have-tools-for-homeowners/) – Offers practical guidance on building a basic home tool kit and what each tool is used for.
- [This Old House – How to Fix a Wobbly Chair](https://www.thisoldhouse.com/furniture/21016768/how-to-fix-a-wobbly-chair) – Step-by-step instructions and visuals for tightening and regluing loose chair joints safely.
- [Mayo Clinic – Mold Exposure and Your Health](https://www.mayoclinic.org/diseases-conditions/mold-allergy/symptoms-causes/syc-20351550) – Discusses health considerations related to mold and mildew, relevant when cleaning bathrooms and shower areas.
- [University of Illinois Extension – Home Storage and Clutter Control](https://web.extension.illinois.edu/clutter/home.cfm) – Provides research-informed tips on organizing entryways and managing everyday household items.