Each tip comes with step-by-step guidance you can tackle in a single afternoon (or less), even if you don’t consider yourself “handy.”
Tip 1: Create a Grab-and-Go Entry Station
If your keys, bag, and mail never land in the same place twice, your entryway is quietly stealing time and energy from you. A simple, intentional “landing spot” near the door can fix that.
What you’ll need
- 3–6 wall hooks or a small hook rack
- A narrow shelf or small wall-mounted basket
- A tray, shallow box, or small dish for keys
- Screws, wall anchors, drill (or strong adhesive hooks if renting)
- Measuring tape and pencil
Step-by-step
- Choose the exact spot. Stand where you naturally remove shoes or set your bag down. That’s where your station belongs—ideally within an arm’s reach of the door.
- Mark hook height. For most people, 60–66 inches from the floor works for coat/bag hooks. Use a pencil to lightly mark where each hook will go.
- Check for level. Use a level (or a level app on your phone) so hooks and shelf line up neatly. This tiny step makes a big visual difference.
- Install hooks.
- For drywall: Use wall anchors if you’ll hang heavy bags or coats.
- For renters: Consider adhesive hooks rated for the weight you need.
- Install a small shelf or basket. Place it slightly below the hooks for mail, sunglasses, or small items. Make sure it doesn’t block the door swing.
- Add a catch-all tray. Place a tray or small bowl on the shelf for keys and loose items. Decide that this is the only spot keys live.
- Test your routine. For a few days, consciously hang your bag, coat, and drop keys in the tray as soon as you walk in. It’ll quickly become automatic.
Why this works: You’re not just organizing “stuff”—you’re simplifying one of the most stressful moments of the day: leaving the house on time and finding what you need.
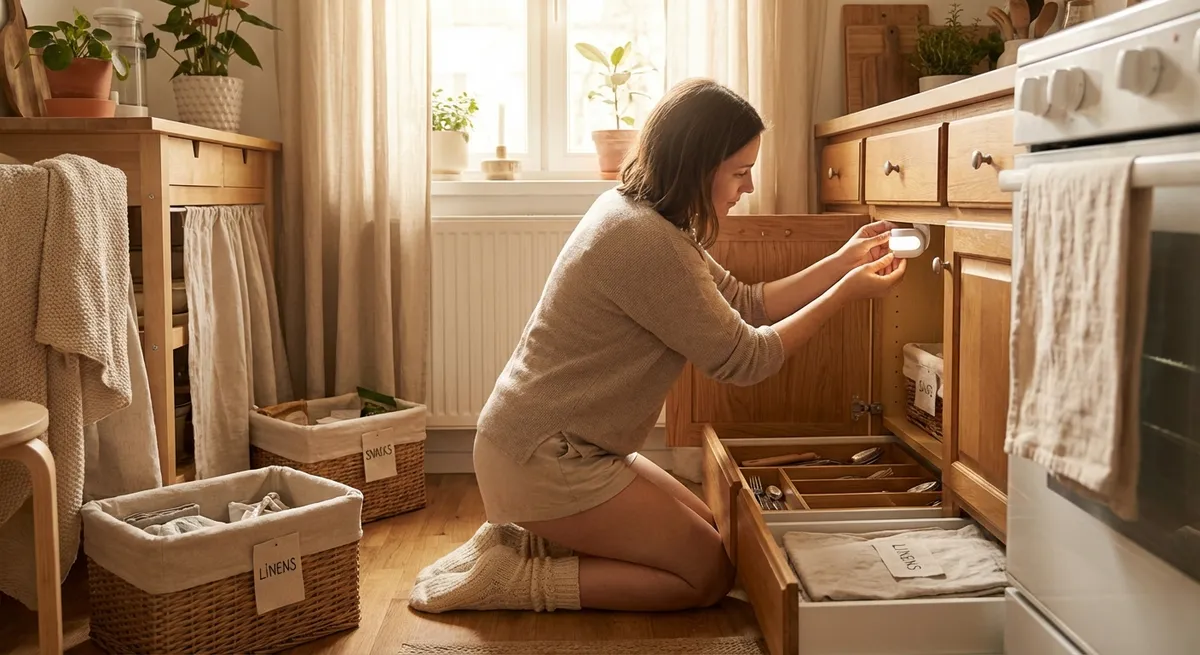
Tip 2: Upgrade One “Annoying” Cabinet with Simple Organizers
Every home has a cabinet or drawer that you avoid opening because chaos spills out. Fixing just one problem spot can make your whole kitchen or bathroom feel calmer.
What you’ll need
- Measuring tape
- Two or three basic organizers (stacking bins, drawer dividers, or a small turntable)
- Sticky labels (optional, but powerful)
- A timer set for 30–45 minutes
Step-by-step
- Pick your target. Choose the one cabinet or drawer you curse under your breath most often: the plastic containers, the cleaning supplies, the spice shelf, etc.
- Measure first. Measure width, depth, and height so you know what size organizers will actually fit.
- Empty it completely. Take everything out and place it on a counter or table. This is the moment that looks worse before it looks better—totally normal.
- Sort into quick categories.
- Keep (used often)
- Keep (rarely used / back stock)
- Trash/recycle
- Donate (clean items you never reach for)
- Wipe the inside. While it’s empty, wipe down the shelves or drawer bottom. This small reset helps the upgrade feel noticeable.
- Add organizers with purpose.
- Use a turntable for spices, oils, or condiments.
- Use stacking bins for snacks or cleaning supplies.
- Use drawer dividers for utensils, tools, or beauty items.
- Assign a “home” for each category. Put daily-use items in the easiest-to-reach front zone. Backups and rarely used items go to the back or higher shelves.
- Label the zones. A piece of masking tape and a pen is enough. Labels tell your future tired self where things belong.
Why this works: You’re not organizing your whole kitchen—just one friction point. The payoff is instant every time you open that door and can actually find what you came for.
Tip 3: Brighten a Dim Room with Simple Layered Lighting
Dim, gloomy rooms can feel smaller and more tiring to be in. You don’t have to touch the wiring or install fancy fixtures to make a room feel brighter and more welcoming.
What you’ll need
- One or two plug-in lamps (table or floor)
- LED bulbs (choose warm white: around 2700–3000K)
- A basic power strip or smart plug (optional)
- Extension cord if outlets are far from where you want the light
Step-by-step
- Identify the dark corners. Stand in the room at night with only your main ceiling light on. Notice where shadows collect—those are your target areas.
- Decide your “zones.”
- A reading or work corner
- A conversation or TV area
- An entry or walkway
- Place lamps for each zone.
- Use a floor lamp beside a sofa or chair.
- Use a table lamp on a dresser, side table, or small stand.
- Aim for light sources at different heights (ceiling, mid-level, and low).
- Choose the right bulbs.
- Warm white (2700–3000K) feels cozy and calm.
- Look for 800–1100 lumens for table lamps (about a 60–75W equivalent).
- Hide cords where you can. Run cords along the wall, behind furniture, or use cord clips to keep them tidy and reduce tripping hazards.
- Connect to a single switch (optional).
- Plug multiple lamps into a power strip or smart plug.
- Use one button or schedule to turn everything on/off together.
- Test at night. Sit in each spot and adjust lamp placement or bulb brightness until the room feels inviting but not harsh.
Why this works: Layered lighting instantly changes how a room feels without paint or construction. It also makes tasks (reading, cooking, hobbies) easier and more comfortable.
Tip 4: Build a Simple “Fix-It” Kit You Can Actually Find
Instead of hunting for a screwdriver every time you need one, create a compact, grab-ready home repair kit. This isn’t a full workshop—just the essentials you’ll actually use for everyday fixes.
What you’ll need
- A small toolbox, sturdy tote, or lidded shoebox
- Basic tools:
- Phillips and flathead screwdrivers (or a multi-bit driver)
- Adjustable wrench
- Hammer
- Tape measure
- Utility knife
- Supplies:
- Assorted picture-hanging hardware
- Command-style adhesive hooks/strips
- Small assortment of nails and screws
- Painter’s tape
Step-by-step
- Collect what you already own. Check drawers, junk baskets, and random shelves. You may already own most of these tools—they’re just scattered.
- Choose a single home for the kit. Pick a spot that’s central and easy to remember: a hall closet, laundry area, or under the stairs.
- Fill your container.
- Put tools on one side.
- Put small supplies in a small lidded container or zip bag so they don’t scatter.
- Add simple “cheat sheets.”
- Write measurements you often forget (frame sizes, window widths).
- Keep a small notepad and pencil inside for quick measurements.
- Label the outside clearly. Something obvious like “Home Fix-It Kit” makes it easy for anyone in the household to find.
- Test it with a real task. The next time you hang a picture or tighten a cabinet handle, notice what you reached for that wasn’t there. Add it if it’s simple and versatile.
- Commit to one rule: Tools go back in the kit as soon as you’re done, not “later.” The whole system works only if everything returns to home base.
Why this works: You remove the biggest barrier to basic home care—searching for tools. When everything you need is in one place, small repairs stop turning into big frustrations.
Tip 5: Quiet a Squeaky Door or Sticky Hinge
Squeaky, sticking doors are tiny annoyances that add up over time. The good news: they’re also one of the easiest home fixes you can learn—and once you know how, you’ll use this skill for years.
What you’ll need
- Lubricant: silicone spray, dry lubricant, or petroleum jelly
- Rag or paper towels
- Step stool if hinges are high
Step-by-step
- Identify the culprit. Open and close the door slowly. Listen near the hinges to confirm that’s where the squeak or resistance is coming from.
- Protect nearby surfaces. Place a rag or paper towel under the hinge area to catch drips.
- Apply lubricant.
- For spray: Lightly spray directly on the hinge pin and moving parts.
- For jelly: Use a small amount on your fingertip or a cotton swab and work it into the hinge gaps.
- Work the door. Open and close the door 10–15 times to help the lubricant spread evenly through the hinge.
- Wipe off excess. Remove any drips or buildup so it doesn’t attract dust or stain the door or frame.
- Repeat if needed. If the squeak only improves a little, apply a second light coat and work the door again.
- Check nearby doors. While you have the supplies out, test other doors or cabinets and treat them too. It takes seconds once you know what you’re doing.
Why this works: You’re learning a low-effort, high-impact fix that immediately changes how your home feels—quieter and smoother, with very little time invested.
Conclusion
Home projects don’t have to mean big budgets, complicated tools, or weekends lost under drop cloths. When you focus on small upgrades that remove daily friction—like an entry station, one well-organized cabinet, better lighting, a simple fix-it kit, and quieter doors—you start to feel the difference in your routines, not just your rooms.
Pick just one of these tips and finish it this week. Once you see how manageable a single, focused project can be, the next one feels less intimidating. Your home doesn’t have to be perfect to work better for you—it just needs a few intentional tweaks you can absolutely handle.
Sources
- [U.S. Department of Energy – Lighting Choices to Save You Money](https://www.energy.gov/energysaver/lighting-choices-save-you-money) - Explains bulb types, color temperature, and efficiency, helpful when choosing LEDs for layered lighting
- [Energy Star – Light Bulb Basics](https://www.energystar.gov/products/lighting_fans/light_bulbs) - Provides guidance on lumens, wattage, and selecting the right bulbs for different spaces
- [Family Handyman – How to Fix a Squeaky Door](https://www.familyhandyman.com/project/how-to-fix-a-squeaky-door/) - Step-by-step instructions and additional tips for quieting door hinges
- [Lowe’s – How to Use Wall Anchors](https://www.lowes.com/n/how-to/use-wall-anchors) - Demonstrates proper use of wall anchors for hanging hooks and shelves safely
- [IKEA – Home Organization Ideas](https://www.ikea.com/us/en/rooms/hallway/) - Visual examples of entryway and small-space storage solutions you can adapt at home