Tip 1: Start a “No-Pressure” Scrap Paper Sketch Pad
You don’t need a fancy sketchbook to feel creative. A simple stack of scrap paper can become your low-stakes, everyday craft launchpad.
What you’ll need:
- Scrap paper (junk mail backs, printer off-cuts, old envelopes)
- Binder clip, rubber band, or hole punch + string
- Pen, pencil, or highlighter
Step-by-step:
- Collect your pages. Gather 15–30 pieces of scrap paper. Trim rough edges if you like, but don’t aim for perfection.
- Stack and secure. Align the edges roughly, then clip them with a binder clip or punch a hole in the corner and tie with string. You’ve just made a zero-cost sketch pad.
- Set a tiny daily goal. Commit to one doodle a day—no rules, no themes. Lines, shapes, a plant on your desk, your coffee mug—anything counts.
- Use time you already have. Doodle during a phone call, while waiting for the kettle to boil, or on a 5-minute break.
- Review weekly, not daily. At the end of the week, flip through your pages and circle 1–2 doodles you like. That’s your progress, not perfection.
This small habit builds your “I make things” identity without time pressure or expensive supplies.
Tip 2: Create a Simple Color Station for Instant Inspiration
A lot of craft frustration comes from constantly digging for supplies. A small, organized “color station” makes it fast and fun to start.
What you’ll need:
- A small box, tray, or basket
- Colored pens, pencils, markers, or crayons
- A few sticky notes or index cards
- Optional: washi tape, highlighters, colored paper
Step-by-step:
- Pick a container. Use a shoebox lid, cutlery tray, or small basket—anything flat and easy to move.
- Gather your color tools. Collect markers, pens, crayons—don’t worry if they’re mismatched or old. Test and toss any that are dried out.
- Add mini canvases. Place a stack of sticky notes, index cards, or small cut pieces of paper in the box.
- Park it in a visible spot. Put your color station where you sit daily: by the couch, on your desk, or near the kitchen table.
- Try quick “color bursts.” When you have 2–3 spare minutes, fill one card with stripes, dots, gradients, or tiny shapes. Experiment with combinations you like.
Later, these mini color cards can become:
- Gift tags
- Bookmarks
- Labels for jars and bins
- Little notes for friends or family
You’re not just “playing with markers”—you’re building a library of small, useful pieces you can grab anytime.
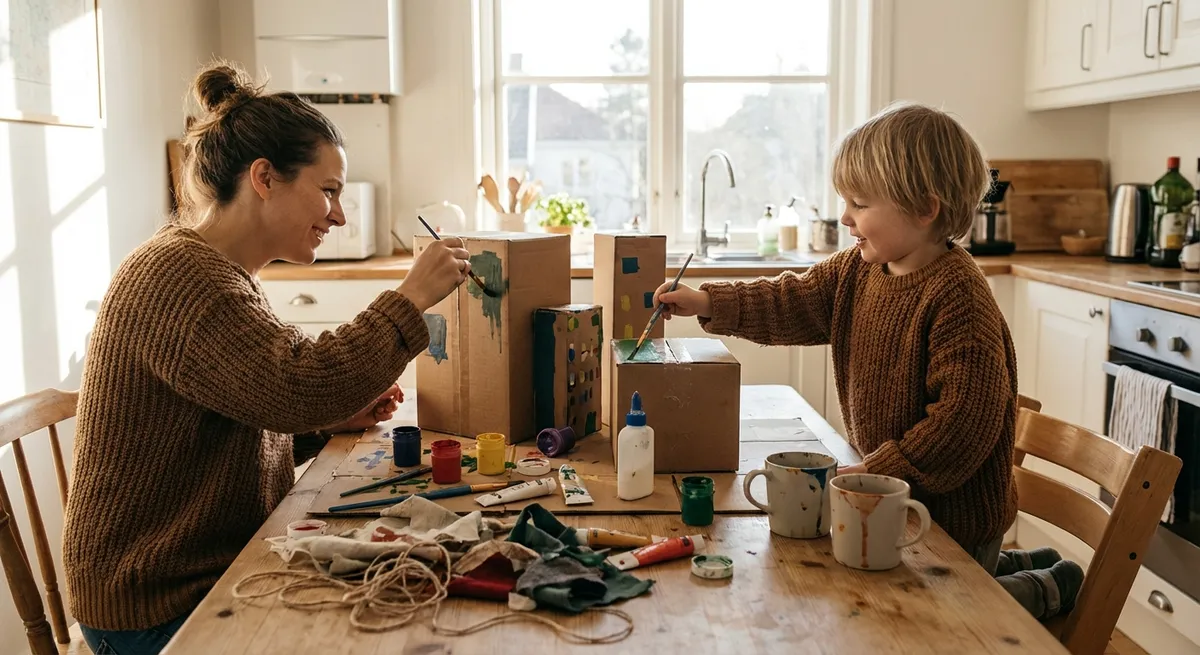
Tip 3: Turn Cardboard Packaging Into Custom Organizers
Instead of throwing out cardboard boxes, turn them into simple organizers that keep your craft space under control and your supplies ready to use.
What you’ll need:
- Small cardboard boxes (cereal, tea, snack, or shipping boxes)
- Scissors or craft knife
- Tape (masking, packing, or washi tape)
- Paper or paint (optional, for decorating)
Step-by-step:
- Choose your box. Look at the area you want to organize (drawer, shelf, desk). Pick a box that roughly fits that space—cereal boxes are great for drawers, tea boxes for desktops.
- Mark your cut line. For a standing organizer, mark a diagonal line so the front is lower than the back (like a magazine holder). For a drawer divider, mark straight horizontal lines around the box to the height you want.
- Cut carefully. Use scissors if possible; if using a craft knife, work slowly and on a safe cutting surface.
- Reinforce and shape. Tape any weak corners inside the box. If you want multiple small compartments, cut extra cardboard pieces as dividers and tape them in place.
- Cover or decorate (optional). Wrap the outside with leftover wrapping paper, brown paper bags, or pages from an old magazine. Secure with tape or glue. You can also paint the outside with acrylic paint if you have it.
- Put it to work. Use your new organizer for pens, ribbons, glue sticks, paintbrushes, cords, or hardware.
You’ve just practiced measuring, cutting, and basic construction—the same skills used in more complex craft and DIY projects—while solving a real storage problem.
Tip 4: Make a “15-Minute Finish” Project Box
One big reason projects stay unfinished: they’re too vague. A “15-Minute Finish” box lets you choose small, clear tasks you can start and finish in one sitting, building real follow-through.
What you’ll need:
- A shoebox or plastic container
- Small zip bags or envelopes
- Scrap paper for labels
- Pen or marker
Step-by-step:
- Pick 3–5 tiny craft ideas. Keep them genuinely small, like:
- “Make 3 gift tags”
- “Decorate 4 plain clothespins”
- “Cover 2 jars with labels and twine”
- “Make a simple bookmark”
- Pack each idea. For every tiny project, put everything you need in one bag or envelope: supplies + tools (except scissors/glue if you share those).
- Example: For gift tags, include pre-cut cardstock pieces, a few markers, some ribbon or string, and a hole punch if you have one.
- Label clearly. On a slip of paper, write the task: “Decorate 3 tags (15 minutes).” Tuck it in or tape it to the bag.
- Store in your box. Keep 3–5 of these mini project packs in a clearly labeled container: “15-Minute Crafts.”
- Use when your energy is low. Instead of scrolling on your phone, grab one pack, set a 15-minute timer, and aim to finish the entire mini project.
By designing projects you can complete in a single sitting, you train your brain to associate crafting with success, not half-finished piles of “someday.”
Tip 5: Build a Simple “Reuse First” Craft Basket
You don’t need a dedicated craft store haul to be creative. A “reuse first” basket turns everyday packaging and leftovers into a ready-to-use material stash—cheap, sustainable, and surprisingly inspiring.
What you’ll need:
- A medium basket, bin, or tote bag
- Clean recyclables and leftovers, such as:
- Cardboard (thin + thick)
- Glass jars with lids
- Tin cans (edges smoothed)
- Fabric scraps or old t-shirts
- Ribbon, string, or twine
- Interesting paper (magazines, brown bags, tissue paper)
Step-by-step:
- Choose your container. It doesn’t need to be pretty—just big enough to hold a variety of items and live in an accessible place.
- Collect mindfully for 1 week. Before tossing any packaging, ask, “Could this be a craft material?” If yes, rinse, dry, and place it in the basket.
- Group by type. Once a week, take 5 minutes to loosely group like with like (paper in one corner, jars in another, fabrics together). This makes it easier to grab what you need.
- Connect with simple uses. When you look at the basket, think in categories:
- Jars → pencil cups, mini vases, storage for beads/buttons
- Cardboard → stencils, gift tags, bookmarks, organizer dividers
- Fabric → coasters, appliqués, no-sew wraps, braided cords
- Set a “basket challenge.” Once a week, choose one item from the basket and ask: “What’s the quickest useful thing I can make from this?” Keep it small and practical.
This habit keeps materials out of the trash and gives you a constant stream of low-pressure project ideas, powered by what you already have.
Conclusion
Crafting doesn’t have to wait for “more time,” “better supplies,” or “real talent.” It can start with scrap paper, cardboard boxes, and a few colored pens—all organized into simple, repeatable habits that fit your actual life. By doodling daily, creating a color station, reusing packaging as organizers, setting up 15-minute project packs, and building a “reuse first” basket, you quietly shift from “I’m not creative” to “I make things all the time.”
Start with just one tip from this list today. Keep it small, keep it doable, and let the wins stack up. Your skills will grow in the background—but more importantly, you’ll prove to yourself that creativity can be part of your everyday routine, not a someday dream.
Sources
- [Smithsonian: The Healing Power of Craft](https://www.si.edu/spotlight/healing-power-of-art) - Discusses how creating art and craft can support well-being and confidence
- [Mayo Clinic – Creativity and Stress Relief](https://www.mayoclinic.org/healthy-lifestyle/stress-management/in-depth/art-therapy/art-20046370) - Explains how simple creative activities can reduce stress, even for beginners
- [Recycle Now (UK)](https://www.recyclenow.com/recycle-an-item/cardboard) - Practical guidance on reusing and recycling cardboard, useful for cardboard-based crafts
- [U.S. Environmental Protection Agency – Reduce, Reuse, Recycle](https://www.epa.gov/recycle) - Background on reuse and waste reduction, supporting the “reuse first” craft basket idea
- [University of Arkansas Extension – Crafting on a Budget](https://www.uaex.uada.edu/life-skills-wellness/personal-finance/crafting-on-a-budget.aspx) - Tips on using low-cost and household materials for crafting