Each project includes simple steps, options to use what you already have, and ideas to make it fit your style.
Tip 1: Turn Glass Jars into Reusable Storage (No Special Tools Needed)
That pasta sauce or jam jar in your recycling bin is basically a free craft supply. With a bit of cleaning and decorating, you can turn glass jars into pen holders, bathroom organizers, or tiny vases.
What you’ll need (use what you have):
- Empty glass jar(s), labels removed
- Dish soap and warm water
- Optional: acrylic paint, paint marker, ribbon, twine, washi tape, or stickers
Step-by-step:
- Clean the jar.
Rinse it with hot, soapy water. To remove sticky labels, soak the jar in warm soapy water for 10–20 minutes, then gently rub off label residue with a sponge or your thumb.
- Dry completely.
Let the jar air-dry or wipe it dry. Any moisture can cause paint or tape to peel later.
- Plan your look.
Decide how you’ll use it:
- Desk pen holder
- Makeup brush holder
- Cotton ball or Q-tip container
- Mini vase for cut flowers
- Decorate the outside.
- For a simple look, wrap twine or ribbon around the top and knot or bow it.
- For a colorful look, use acrylic paint to add stripes, dots, or a solid color. Let each coat dry before adding another.
- For labels, write on washi tape or a piece of masking tape with a marker and stick it on.
- Let everything set.
If you painted the jar, let it dry fully—at least a few hours or overnight for thick paint.
- Put it to work.
Fill the jar with whatever it’s meant to hold and place it where you’ll actually use it (desk, vanity, bathroom shelf).
Make it your own:
Mix and match colors, add your initials, or create a small set of matching jars for a shelf or workspace.
Tip 2: No-Sew Fabric Coasters from Scraps
If you have an old T-shirt, pillowcase, or fabric scraps lying around, you have the makings of simple coasters. This project requires no sewing and can be done at a kitchen table in under an hour.
What you’ll need:
- Old T-shirt, dish towel, or cotton fabric
- Scissors
- Cardboard (cereal box works well)
- Glue (fabric glue or white craft glue)
- Pen or pencil
- Optional: ruler
Step-by-step:
- Cut a template.
Cut a square or circle out of cardboard, about 4 inches (10 cm) across. This will be your coaster shape.
- Trace your fabric.
Place the cardboard on the fabric and trace around it. For each coaster, trace two fabric pieces so your coaster has a front and back.
- Cut out fabric pieces.
Cut along the traced lines as neatly as you can. Slight imperfections will be less visible once glued.
- Add a cardboard core (optional but sturdy).
Cut a slightly smaller shape from cardboard (about ⅛ inch less all around). This will sit between your two fabric layers for extra stability.
- Glue the layers.
- Put a thin layer of glue on one fabric piece (the back side).
- Press the cardboard core on top (if using).
- Add more glue on top of the cardboard, then place the second fabric piece (back side down) on top, making a fabric–cardboard–fabric sandwich.
- Smooth and press.
Smooth out any wrinkles from the center outward. Place a heavy book on top and let it dry for at least a few hours.
- Trim edges if needed.
Once dry, carefully trim any uneven edges.
Make it your own:
Use fabric from a sentimental T-shirt, an old tablecloth, or mix patterns for a fun set. You can even make seasonal coasters—bright colors for summer, darker tones for fall.
Tip 3: Simple Wall Art with Paper and a Frame
You don’t need to “be an artist” to create wall art you’ll actually like. With a plain frame and some paper, you can make bold, modern art that looks intentional, not complicated.
What you’ll need:
- Picture frame (thrifted or reused is perfect)
- Colored paper, scrapbook paper, or old magazines
- Scissors
- Glue stick or tape
- Blank sheet of paper or the frame’s backing
Step-by-step:
- Prep your frame.
Remove any old photo or art. Keep the backing and glass (if it has glass). Clean the glass with a soft cloth.
- Choose your color palette.
Pick 2–4 colors that go with your room. You can rip pages from magazines that fit your color scheme.
- Cut simple shapes.
Cut out basic shapes: circles, rectangles, arches, or abstract “blobs.” Don’t worry about perfect edges—rough shapes can look stylish.
- Arrange without gluing first.
On a blank sheet (the size of your frame), lay out the shapes. Overlap some, leave white space, and move pieces around until it feels balanced.
- Commit and glue.
Once you like the arrangement, glue each piece down. Start with the bottom layer and work upward so overlapping pieces sit on top.
- Frame it.
Place the finished sheet into the frame, secure the backing, and wipe any smudges from the glass.
- Hang or lean.
Hang your art or simply lean it on a shelf or dresser.
Make it your own:
Use kids’ drawings, ticket stubs, or small photos mixed in with paper shapes for a memory collage that still looks clean and modern.
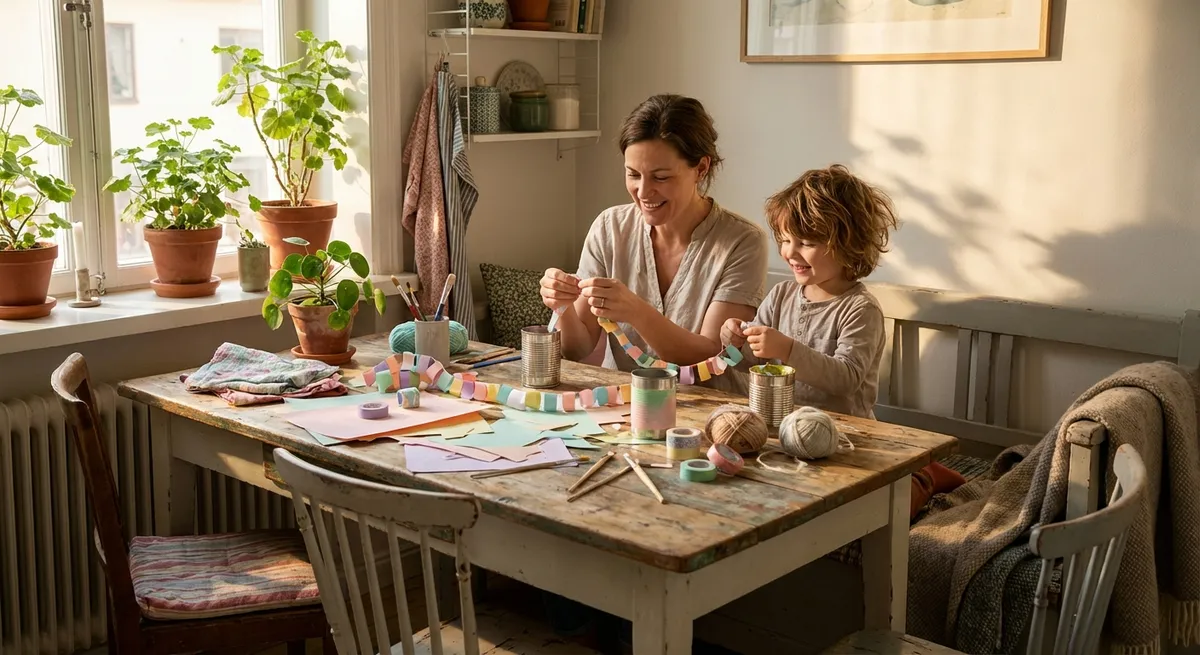
Tip 4: Upcycled Tin Can Desk Organizer
Tin cans (from beans, tomatoes, etc.) can become sturdy organizers with just a bit of cleanup and decoration. This craft is especially good if you want more order on your desk or in a craft corner.
What you’ll need:
- Empty, clean tin cans (edges smoothed and labels removed)
- Dish soap, warm water
- Sandpaper or a spoon (to smooth any sharp edges, if needed)
- Paper, fabric, or paint
- Glue or tape, plus a brush if painting
Step-by-step:
- Prep the cans.
Wash the cans with hot, soapy water and let them dry. If the inner rim feels sharp, carefully smooth it with sandpaper or run the rounded back of a spoon along the edge.
- Remove labels and residue.
Soak cans briefly in warm soapy water to loosen labels. Scrub off any remaining glue.
- Choose your finish.
Decide if you want to:
- Paint the cans with acrylic paint
- Wrap them with paper (scrapbook paper, brown kraft paper, or magazine pages)
- Wrap them with fabric
- Decorate.
- For paint: Apply a thin first coat, let it dry, then add a second coat.
- For paper/fabric: Measure the can’s height, cut a strip of your material to that height plus a little overlap. Wrap it around and glue or tape securely.
- Let everything dry.
Allow paint or glue to dry fully so the surface feels solid, not tacky.
- Arrange your organizer.
Group several cans together in a row or cluster. You can glue them to a piece of cardboard or wood to keep them in place, or just line them up.
- Fill and enjoy.
Use them for pens, paintbrushes, scissors, craft tools, kitchen utensils, or makeup brushes.
Make it your own:
Add labels, tie a piece of ribbon or twine around each can, or stick on simple stickers or washi tape for extra color.
Tip 5: Quick Personalized Bookmarks
Whether you’re a big reader or just want a small, relaxing craft, bookmarks are a great beginner project. They’re fast to make, useful, and easy to gift.
What you’ll need:
- Cardstock, cereal box cardboard, or thick paper
- Scissors
- Hole punch (optional)
- Ribbon, string, or yarn (optional)
- Pens, markers, stickers, or washi tape
Step-by-step:
- Cut your base.
Cut a strip of sturdy paper or cardboard about 2 inches wide and 5–6 inches long. Don’t worry about perfect measurements; aim for a slim rectangle.
- Smooth the edges.
Trim any rough bits. You can round the corners slightly for a softer look.
- Decorate one side.
- Use markers or pens to draw simple patterns (stripes, dots, stars).
- Add a favorite short quote or your name.
- Use washi tape or small stickers for quick decoration.
- Decorate the back (optional).
Keep it simple—maybe just your name, a small doodle, or leave it blank.
- Add a tassel or ribbon (optional).
Punch a hole at the top center, thread a short piece of ribbon or yarn through, and tie a knot to secure.
- Seal (optional).
If you want extra durability, you can cover the bookmark with clear tape on both sides or use self-adhesive laminating sheets, then trim the edges.
Make it your own:
Make a set in different colors, create themed bookmarks for the types of books you like, or involve kids by having them design their own.
Conclusion
Crafting doesn’t have to be a big, intimidating project. These small, practical ideas let you use what you have, learn simple techniques, and finish something in a single sitting. Start with one project that feels easiest, don’t worry about perfection, and let your style show up in your colors, patterns, and materials.
Every time you see a jar, coaster, piece of wall art, organizer, or bookmark you made yourself, you’ll get a little reminder: you’re capable of making useful, beautiful things with your own hands—and you can always make more.
Sources
- [U.S. Environmental Protection Agency – Reduce, Reuse, Recycle](https://www.epa.gov/recycle) - Overview of ways to repurpose materials like glass, metal, and paper at home
- [The Spruce Crafts – Upcycling Ideas](https://www.thesprucecrafts.com/upcycling-ideas-4178359) - Inspiration and safety tips for turning everyday items into crafts
- [Better Homes & Gardens – DIY Wall Art Ideas](https://www.bhg.com/decorating/do-it-yourself/wall-art/diy-wall-art-ideas) - Examples of simple, beginner-friendly wall art projects
- [Michaels – Craft Basics & Techniques](https://www.michaels.com/project-guides) - Step-by-step guides for common crafting tools, glues, and paints
- [Goodwill Industries – Creative Reuse & Upcycling](https://www.goodwill.org/blog/how-to/creative-upcycling-and-diy-projects) - Practical ideas for reusing household items in DIY projects