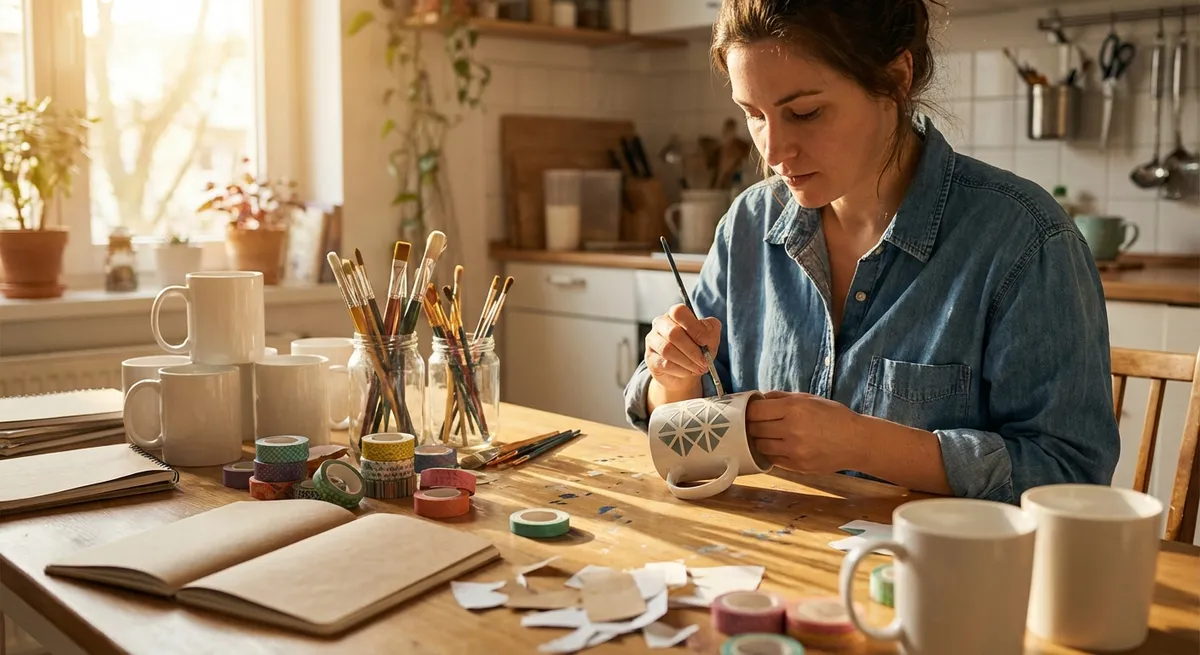
Getting Started With Low-Stress Crafting
You don’t need a room full of supplies to start crafting. A few basics can take you surprisingly far: scissors, tape, glue (school glue is fine), a marker, and something to cut on (like a cardboard scrap or cutting board). From there, you build slowly—only buy what a specific project truly needs.
Choose projects that:
- Use materials you already have, or can get cheaply.
- Take less than an hour, so you can finish in one sitting.
- Have a clear purpose (a bookmark, a gift tag, a container), so it doesn’t feel like “pointless” crafting.
As you work, think “good enough,” not “perfect.” Crooked edges and slightly wonky lines are proof that a real person made it. Start with small steps: one cut, one fold, one decoration at a time. You’re not trying to impress anyone—you’re just learning a new, useful way to make your everyday stuff more personal.
DIY Tip #1: Fabric-Scrap Coasters From Old Clothes
If you’ve got an old T-shirt, pillowcase, or pair of pajama pants that’s too worn to donate, you already have coaster material. These soft, washable coasters protect your table and give old fabric a second life.
You’ll need:
- Old fabric (T-shirt, flannel, cotton)
- Scissors
- Needle and thread or fabric glue
- Cardboard or an existing coaster as a size guide
Step-by-step:
- Make a template: Cut a square or circle of cardboard about 4 inches wide. That’s your coaster size.
- Trace and cut: Lay the cardboard on your fabric. Trace around it and cut out 2–3 identical fabric shapes per coaster.
- Layer it up: Stack the shapes so the nicest sides are facing out. More layers = thicker, more absorbent coaster.
Secure the edges:
- Sewing option: Use a simple running stitch (up, down, up, down) around the edge, about ¼ inch in. Doesn’t need to be perfect. - No-sew option: Run a thin line of fabric glue near the edge between the layers. Press firmly and let dry. 5. Add personality (optional): Use a permanent marker or fabric paint to add a tiny doodle, your initials, or a simple border line.
These are forgiving, quick to make, and great as small gifts. If the first one looks rough, call it a test piece and use it anyway—it’s doing its job.
DIY Tip #2: No-Stress Bookmark From Paper Scraps
This is a tiny project that turns junk mail, cereal boxes, or leftover wrapping paper into something you’ll actually use. It’s also a low-pressure way to play with color and design.
You’ll need:
- Scrap cardboard (cereal box, shipping box, etc.)
- Decorative paper (magazines, old calendars, wrapping paper, paper bags)
- Glue stick or school glue
- Scissors
- Hole punch (optional)
- String, ribbon, or yarn (optional)
Step-by-step:
- Cut the base: Cut a strip of cardboard about 1.5–2 inches wide and 5–6 inches long.
- Cover with “pretty” paper: Cut decorative paper slightly larger than your strip. Glue it to one side, smooth it out, then trim the edges.
- Finish the back: Leave the back plain, or glue plain paper over it for a writing surface where you can note quotes or page numbers.
- Seal (optional): Rub a thin layer of glue over the front and back to act as a protective coat. Let dry completely.
- Add a tassel (optional): Punch a hole at the top, thread through ribbon or string, and tie a knot.
This is a great “warm-up” craft—something you can do while watching TV or listening to music. Keep a small stack by your books or give them away with borrowed reads.
DIY Tip #3: Reusable Gift Wrap From a Pillowcase or T-Shirt
Instead of buying new gift bags every time, turn an old pillowcase or T-shirt into a reusable fabric wrap. It’s simple, looks thoughtful, and saves money over time.
You’ll need:
- Clean pillowcase or adult-size T-shirt
- Scissors
- Ribbon, string, or a fabric strip
- Needle and thread or fabric glue (optional, for a neater finish)
Step-by-step (Pillowcase Wrap):
- Prep the case: Iron it if it’s very wrinkled, but don’t stress if you skip this.
- Wrap the gift: Place the gift inside the pillowcase like a bag.
- Gather and tie: Gather the open end and tie it with ribbon or string. You can leave the top loose and “ruffled” for a casual look.
- Optional handle: If you want it more like a gift bag, use ribbon or fabric strips to tie around the gathered part again, creating a makeshift handle.
- Cut off sleeves: Lay the shirt flat and cut off both sleeves along the seams to create “handles.”
- Cut a new opening: Cut a deeper scoop in the neck hole to make a wider opening if needed.
- Close the bottom: Turn the shirt inside out and tie knots along the bottom hem with the front and back layers together. Turn it right-side out again.
- Use as a gift “bag”: Place your gift inside and tie the handles together.
Step-by-step (T-Shirt Bag, no sewing):
These wraps can be reused again and again. Add a small note: “This wrap is reusable—pass it on!”
DIY Tip #4: Simple Mason Jar Organizer With a Paper Label Wrap
If you have an empty jar (pasta sauce, jam, or an actual mason jar), you’re one step away from a better-organized workspace or kitchen. This project is about usefulness first, looks second.
You’ll need:
- Clean glass jar
- Paper (plain, colored, or patterned)
- Pen or marker
- Tape or glue
- Ruler (optional)
Step-by-step:
- Measure loosely: Wrap a strip of paper around the jar to check the length. Mark where it overlaps slightly, then cut to size.
- Choose a purpose: Decide what this jar will hold: pens, utensils, makeup brushes, screws, tea bags, etc. The clearer the purpose, the more useful it becomes.
- Create a label band: On the paper strip, write the category clearly in big letters: “PENS,” “TEA,” “CHARGERS,” “SCREWS,” etc.
- Wrap and secure: Wrap the paper around the jar and tape or glue the ends together. Don’t glue it to the jar if you want to reuse the jar or change labels later.
- Optional extras: Add a quick doodle, small border, or use colored paper for easy visual cues (blue for office stuff, green for kitchen, etc.).
Make a small set—three jars labeled “PENS,” “ODD CORDS,” and “TOOLS”—and you’ve already lowered your everyday clutter stress.
DIY Tip #5: Simple Scent Sachets From Rice and Tea Bags
These small fabric or paper sachets can freshen drawers, gym bags, or closets. Instead of buying specialty sachets, you can make your own with pantry items.
You’ll need:
- Unused tea bags or small fabric scraps
- Dry rice
- Dried herbs, tea leaves, or spices (lavender, chamomile, mint, cinnamon, etc.)
- Spoon
- Needle and thread or tape/stapler (depending on your pouch style)
Option 1: Tea Bag Fresheners
- Open carefully: Gently open the top of a tea bag without tearing the sides.
- Empty contents: Pour out the original tea (you can save it for another use like compost).
- Refill: Mix 1–2 teaspoons of rice with a pinch of dried herbs, tea, or spices. Spoon the mix into the bag.
- Seal the top: Fold the top down twice and secure with a small piece of tape or staple.
- Use: Tuck into shoes, drawers, or bags. Gently shake once in a while to refresh the scent.
- Cut a rectangle: Cut two small fabric rectangles (about 3x4 inches).
- Sew or glue sides: Place them together with the “nice” sides facing in. Sew or fabric-glue along three sides, leaving the top open.
- Turn right-side out: Flip it so the nice sides are now outside.
- Fill and close: Spoon in a mix of rice and dried herbs, then stitch the top closed or fold it and secure with a couple of stitches.
Option 2: Fabric Pouch Sachets
These won’t overpower a room like commercial air fresheners, but they add a gentle, clean scent to small spaces using things you likely already have.
Conclusion
Crafting doesn’t require a full workshop, perfect skills, or expensive materials. It starts with noticing what you already have—old fabric, empty jars, extra paper—and giving those items a new job. Each of these projects is meant to be simple, finishable, and genuinely useful in daily life.
Pick just one idea and do the smallest possible step: cut one rectangle, label one jar, or turn one T-shirt into a bag. Finishing even a tiny project builds real confidence. Over time, these little wins add up to a home that feels more like yours—not because you bought more stuff, but because you made it.
Sources
- [U.S. Environmental Protection Agency – Textiles: Facts and Figures](https://www.epa.gov/facts-and-figures-about-materials-waste-and-recycling/textiles-material-specific-data) - Background on textile waste and why reusing old fabric (like T-shirts and pillowcases) is helpful
- [University of Illinois Extension – Reusing and Repurposing Household Items](https://extension.illinois.edu/blogs/green-speak/2021-04-16-reuse-and-repurpose-items-around-your-home) - Practical ideas for turning everyday items into useful projects
- [Iowa State University Extension – Creative Reuse for Crafting](https://www.extension.iastate.edu/news/creative-reuse-crafting) - Guidance on upcycling and simple craft approaches that fit into everyday life
- [Goodwill Industries – What to Do With Clothing You Can’t Donate](https://www.goodwill.org/blog/how-to/what-to-do-with-clothing-you-cant-donate/) - Suggestions that align with turning worn clothing into useful DIY projects
- [PennState Extension – Home Organization Tips](https://extension.psu.edu/home-organization) - General organizing principles that support using labeled containers and simple storage solutions