With a little DIY spirit, you can create your own “travel calm kit” using simple, inexpensive items you probably already have at home. Whether you’re flying, taking a train, or stuffed in the backseat of a car, these projects will help you stay organized, comfortable, and just a little more in control of the chaos.
Below are five practical, step‑by‑step DIY travel helpers inspired by the current wave of holiday‑travel gadget guides—only these you can make yourself.
DIY Cord + Charger Roll From an Old T‑Shirt
Tangled cords at the bottom of your bag are the unofficial mascot of holiday travel. Instead of buying yet another tech organizer, turn an old T‑shirt into a soft, roll‑up cord keeper.
What you’ll need
- Old cotton T‑shirt or thin knit top
- Scissors
- Ruler (optional but helpful)
- Needle and thread or fabric glue
- Small elastic hair ties or ribbon
Steps
Cut your base:
Cut a rectangle about the length of your tablet or notebook (roughly 10–12" long and 6–8" tall). Don’t stress about perfection; you’ll trim later if needed.
Create cord loops:
From the same shirt, cut narrow strips (about 1" x 3–4"). Fold each strip into a loop and either sew or fabric‑glue the ends down along one side of the rectangle, spacing them about 1.5" apart. These will hold your cables.
Add a pocket (optional but handy):
Cut a smaller rectangle (about half the height of the base) and sew or glue three sides to the opposite end of the base to form a pocket for your power brick or earbuds.
Attach a closure:
Sew or glue an elastic hair tie to one short end of the base. This will loop around the roll to keep it closed. If you don’t have elastic, a piece of ribbon works too.
Load and roll:
Slide each cord into a loop, tuck chargers or adapters in the pocket, then roll the whole thing up and secure with the elastic.
Now, when you hit that crowded charging station at the airport, you’ll be the one calmly unrolling a neat little kit instead of untangling spaghetti.
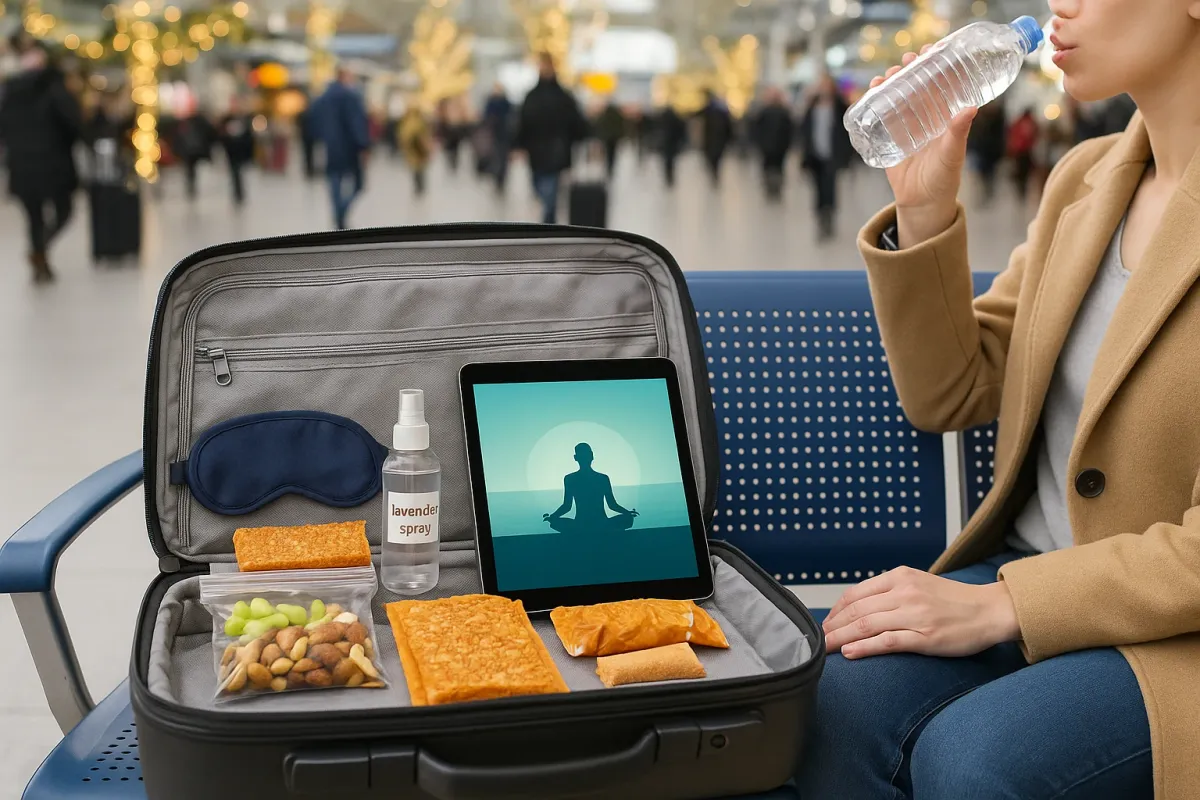
Snack + Sanity Pouch From a Reused Freezer Bag
That viral travel gadget list includes tons of snack organizers and mini pouches—but you can easily DIY a wipe‑clean, see‑through kit using a simple freezer bag. This keeps you from overpaying for snacks at the terminal and saves time during security checks.
What you’ll need
- 1 heavy‑duty freezer zip bag (quart or gallon size)
- Washi tape or duct tape
- Permanent marker
- Optional: small paper bags or cupcake liners
Steps
Reinforce the edges:
Run strips of washi or duct tape along the sides and bottom of the bag to make it sturdier and longer‑lasting. Fold the tape over the edge so it covers both sides.
Create “zones” inside:
Use small paper bags or cupcake liners as dividers for different categories: salty, sweet, protein, and “emergency” (gum or mints).
Label the front:
With a permanent marker, label sections on the outside of the bag: “Snacks,” “Meds,” “Gum,” etc. You don’t need interior walls—the labels will remind you where to place things.
Fill smartly:
Add non‑crumbly, travel‑friendly snacks: nuts, granola bars, dried fruit, crackers, or individually wrapped treats. If needed, keep a tiny section for pain relievers, motion‑sickness tablets, or lozenges (in original labeled packaging).
Make it grab‑and‑go:
Store this pouch at the very top of your carry‑on. It’s clear, so security agents can see what’s inside easily, and you can access it without unpacking half your bag.
You’ve just created your own budget‑friendly version of those fancy “travel snack systems” that keep showing up in gift guides—customized to what you and your family actually eat.
No‑Sew Neck Pillow From an Old Hoodie
Those U‑shaped neck pillows featured in travel gadget roundups are nice—but they’re often overpriced, bulky, and not very washable. With an old hoodie and some soft stuffing (or even old T‑shirts), you can make a cozy, machine‑washable version at home.
What you’ll need
- Old hoodie (fleece or cotton works best)
- Scissors
- Safety pins or binder clips
- Stuffing: old T‑shirts, fabric scraps, or pillow stuffing
- Optional: 2–3 large buttons and needle/thread (or safety pins)
Steps
Mark the shape:
Lay the hoodie flat. Use the body (not the sleeves) to cut a large letter “U” shape—the open part of the U should face the bottom hem. Try to make it as long as your neck from shoulder to shoulder.
Cut two identical pieces:
Cut through both layers of fabric so you end up with two identical U‑shaped pieces. These will be the front and back of your pillow.
Pin the edges:
Place the two pieces together, right sides facing out. Use safety pins or binder clips to secure the edges, leaving a 3–4" opening on one side for stuffing.
Seal the seams (no‑sew method):
Fold the edges inward a tiny bit and secure them together with a tight row of safety pins all the way around, except the opening. Place pins close together so the stuffing won’t escape.
Stuff until firm but comfy:
Push small pieces of T‑shirt or pillow stuffing through the opening, working them into the “arms” of the U first, then the back. Adjust until it feels supportive but not rock‑hard.
Close the opening:
Pin the final opening securely. For a more permanent finish, hand‑sew this last section, but pins work in a pinch—just make sure they’re fully closed.
Add a strap (optional):
Use the hoodie’s drawstring or a fabric strip to create a small loop and attach with buttons or safety pins. This loop can hang on your luggage handle.
You’ve now got a custom neck pillow that cost basically nothing and can be tossed straight into the washer when you get home.
Flat‑Pack “Mini Office” From a Cereal Box
With so many people trying to work on the go during the busy travel season, organizers and laptop stands are trending on every gadget list. You can DIY a slim, kid‑proof “mini office” from a cereal box that keeps your essentials together: pens, small notebook, sticky notes, and device stand.
What you’ll need
- Empty cereal box
- Craft knife or scissors
- Ruler
- Tape or glue
- Scrap paper or wrapping paper
- Elastic band or hair tie
Steps
Prepare the box:
Open the box flaps at the top and bottom so it lays flat. Choose the side that will become the “outside” of your mini office.
Create the folder shape:
Trim the height if needed so it fits your backpack. Fold it back into a rectangular shape, but instead of closing the top, cut off the top flaps cleanly. Tape or glue the bottom flaps shut securely.
Add interior pockets:
From the leftover cardboard, cut 2–3 rectangles to act as pockets. Tape or glue them inside the “cover” at different heights—one for a small notebook, one for loose paper, and a smaller one for pens or cables.
Make a simple device stand:
Cut a strip of cardboard about 2" wide and as long as the box is wide. Fold it into a triangle and tape the edges to create a solid “wedge.” Glue or tape it flat to the inside bottom edge so you can rest your phone or small tablet against it when the “folder” is open.
Decorate for durability:
Cover the outside with scrap paper, wrapping paper, or even leftover holiday gift wrap. This adds structure and makes it look more intentional than “breakfast packaging.”
Add a closure:
Wrap an elastic band or hair tie around the closed organizer to keep everything from spilling out in your bag.
This DIY mini office keeps everything you need for working or studying in transit in one spot—no digging under your seat for a rogue pen while the seatbelt sign is on.
Quiet‑Time “Calm Kit” For Kids (Or Stressed Adults)
With families traveling again in big numbers, there’s a surge in sales of kids’ travel activity sets. But you can build your own calm kit tailored to your child (or yourself) using simple, screen‑free supplies.
What you’ll need
- Pencil case, lunchbox, or small tin
- Index cards or small notebook
- Colored pencils or crayons (no markers if you’re worried about leaks)
- A few binder clips or paper clips
- 2–3 small, quiet activities (see ideas below)
- Zip bag for trash
Steps
Choose a sturdy container:
Pick something that closes securely and can survive getting stepped on or dropped. A metal tin or hard plastic pencil case works well.
Create simple activity cards:
On index cards, write or draw small prompts: - “Draw your dream vacation house.” - “List 5 things you want to do in the new year.” - “Invent a new animal—what does it eat?” Clip them together so they don’t scatter.
Add low‑mess supplies:
Pack a tiny sharpener, a few colored pencils or crayons, and a small notebook. Avoid markers or glitter—no one needs that at 30,000 feet.
Include 2–3 “fidgets”:
DIY options: a piece of soft fabric to fold, a large paperclip chain, a few rubber bands to stretch, or origami paper with printed folding instructions taped inside the lid.
Pack a mini “reset” note:
Write a simple card: “Take 5 deep breaths. Count 10 things you can see. You’re doing great.” For kids, add simple drawings; for adults, maybe a tiny gratitude or grounding exercise.
Add a trash bag:
Put a small zip bag in the kit so wrappers, paper scraps, and snack bits don’t migrate to every pocket of your bag.
Now you (or your kids) have a dedicated little island of calm to open when the delays hit or the seatbelt sign turns on yet again.
Conclusion
As holiday travel ramps up—and articles about must‑have travel gadgets crowd your feed—it’s easy to feel like you need to buy your way to a smoother trip. But a calmer, more organized journey is absolutely something you can DIY.
With a few old T‑shirts, a cereal box, and a couple of zip bags, you can:
- Keep cords and chargers from taking over your bag
- Avoid overpriced terminal snacks
- Actually get some rest with a custom neck pillow
- Work or study comfortably on the go
- Give yourself (and your kids) a simple, screen‑free way to reset
You don’t control the delays, the crowds, or the security lines—but you do control how prepared you are. Start with just one of these projects today, toss it in your carry‑on, and let your future traveling self breathe a little easier.