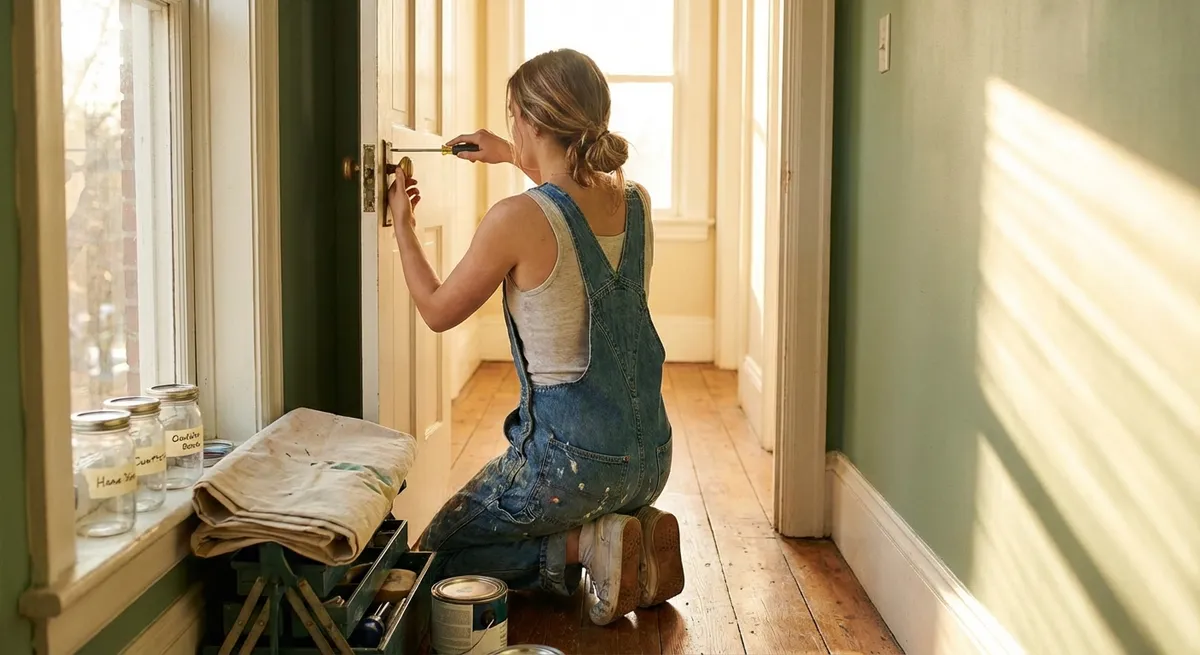
Below are five approachable DIY tips that almost anyone can follow, even in a small apartment. Each one is broken into clear, doable steps so you can take action right away.
Tip 1: Create a Tiny “Fix-It Station” So Repairs Don’t Feel Overwhelming
One of the biggest barriers to doing DIY tasks isn’t skill—it’s friction. If you have to dig through a closet or borrow tools just to tighten a screw, you’re far less likely to actually do it. A small, organized fix-it station makes it easy to act when you notice a problem.
What you’ll need (basic starter kit):
- Phillips and flathead screwdriver (or a small multi-bit driver)
- Tape measure
- Small hammer
- Utility knife or strong scissors
- Assorted picture-hanging hooks and nails
- Super glue and painter’s tape
- A few adhesive cable clips or zip ties
- A small container or shoebox to hold everything
Step-by-step:
- Choose a spot you actually pass daily.
A hallway shelf, entryway cabinet, or kitchen drawer works better than a random closet. Easy access is the whole point.
- Gather the tools you already own first.
Before buying anything, collect what’s scattered around your home. You may have more than you think.
- Fill in the missing basics.
Pick up affordable versions of the missing essentials. You don’t need pro-grade tools—reliable basics are enough.
- Add a “consumables” mini kit.
Toss in extra batteries, felt pads for furniture, a roll of painter’s tape, and a few sticky hooks. These solve a surprising number of small problems.
- Label the container.
Write “Fix-It Kit” on the box so everyone in your home knows where tools live and where to return them.
- Use a simple rule: handle 2-minute fixes immediately.
If a task can be done in under two minutes with your kit—tightening a loose cabinet knob, sticking down a peeling corner of wallpaper—do it right away.
This small setup lowers the mental barrier to DIY so much that you’ll naturally start taking on more.
Tip 2: Calm Visual Clutter With Simple Cable Taming
Few things make a room feel messier than tangles of cords behind the TV or under the desk. The good news: you don’t need special furniture or power strips with built-in organizers to make cables disappear visually.
What you’ll need:
- Adhesive cable clips or command hooks
- Zip ties, Velcro straps, or twist ties
- Painter’s tape (for temporary solutions)
- Optional: a cable sleeve or inexpensive cable box
Step-by-step:
- Unplug and sort by function.
Safely unplug devices from the wall. Separate TV cables, game console cables, computer cables, and chargers into small groups.
- Shorten the excess length.
Loop long cables into neat coils and secure with a Velcro strap or zip tie. Don’t overtighten—just snug enough to hold.
- Lift cables off the floor where possible.
Use adhesive clips or command hooks on the back of furniture or along the underside of your desk to route cords in a straight line instead of dangling.
- Bundle cables that always travel together.
For example, your monitor cable and power cable can share a cable sleeve or a few straps so they move as one unit.
- Hide the “power strip chaos” zone.
Place your power strip in a simple cable box or behind a piece of furniture. Just make sure it has enough space for ventilation and isn’t covered with fabric.
- Label both ends of important cables.
Use masking tape or small labels with words like “TV HDMI 1,” “Router Power,” or “Monitor.” This saves huge frustration when you need to unplug one thing later.
- Do one zone at a time.
Start with either your TV area, desk, or nightstand—whichever you look at the most. Enjoy the difference before moving on to the next area.
This quick project doesn’t just look better; it also makes cleaning easier and reduces the chance of yanking the wrong cord.
Tip 3: Make Everyday Walls More Useful With Simple Hooks and Rails
Empty walls are missed opportunities—especially in small spaces. A few well-placed hooks or a basic rail system can turn unused space into a landing zone for bags, keys, or kitchen tools, keeping surfaces clearer and your routines smoother.
What you’ll need:
- Command hooks or removable adhesive hooks (for renters)
- Or: wall anchors, screws, and a drill (if you can make holes)
- A basic rail with hooks, or individual hooks
- Pencil, level (or a level app on your phone), measuring tape
Step-by-step:
- Choose a daily routine to support.
Do you always toss your bag on a chair? Pile keys on the counter? Stack jackets on the couch? Pick one habit you’d like to streamline.
- Find a wall within arm’s reach of that habit.
For example:
- Entry: wall by the door for keys and bags
- Kitchen: wall near the stove for utensils or potholders
- Bedroom: back of the door for robes or tomorrow’s outfit
- Mark your height thoughtfully.
- 60–65 inches from the floor for general hooks
- Lower if kids will use them
- Eye-level or just below for rails
- Use your level (or app) to keep things straight.
Use a pencil to mark where hooks should go. Aim for:
Even a small rail looks much more “professional” when it’s level. Adjust your pencil marks until the bubble (or app line) is centered.
Install according to your situation:
- Renter-friendly: Clean the wall with rubbing alcohol, let dry, then stick adhesive hooks/rails following the product instructions. - If drilling is okay: Use appropriate wall anchors and screws for heavier items like coats or bags.
- Assign a job to each hook.
Tell yourself, “This one is for keys, this one is for my work bag, this one is for my dog leash.” Clear roles make the habit stick.
- Test the setup for a week.
If something feels awkward (too high, too cramped), adjust it. Small tweaks make a big difference in everyday use.
The goal isn’t a Pinterest-perfect wall—it’s to give your belongings obvious “homes” so clutter doesn’t pile up in random places.
Tip 4: Refresh Tired Surfaces With Peel-and-Stick Upgrades
If you rent—or just don’t want to commit to permanent changes—peel-and-stick products are your secret weapon. They can upgrade the look of shelves, backsplashes, and even furniture with little risk and a lot of impact.
What you’ll need (choose what fits your space):
- Peel-and-stick contact paper, wallpaper, or backsplash tiles
- Scissors or a utility knife
- Ruler or straight edge
- Smoothing tool (a plastic card can work)
Great spots to try:
- Inside tired kitchen cabinets or pantry shelves
- The back of a bookshelf
- A small accent area, like behind a coffee station
- A plain side table or dresser top (sealed and smooth surfaces work best)
Step-by-step:
- Pick a small test area.
Start with the inside of a cabinet, drawer, or a single shelf. This builds confidence without pressure to get it “perfect.”
- Clean and dry the surface thoroughly.
Wipe away grease, dust, or crumbs, and let it dry completely. Adhesive sticks best to clean, smooth surfaces.
- Measure twice, cut once.
Measure your space carefully and add about 1 inch extra on all sides when you cut your piece. You can trim off the excess later.
- Peel the backing a little at a time.
Don’t remove the whole backing at once. Start at one edge, peel back 2–3 inches, and position that part carefully.
- Smooth as you go.
Use your hand or a plastic card to push out air bubbles from the center outward while slowly peeling more backing.
- Trim the edges.
Once it’s fully applied, use your utility knife or scissors and a straight edge to carefully trim the extra material along the edges.
- Live with it for a few days before doing more.
If you like how it looks and holds up, move on to a slightly bigger or more visible area.
Peel-and-stick projects are forgiving: if you misplace a piece, you can usually gently lift and reposition it. That makes them perfect for beginners.
Tip 5: Build a Simple “Home Check” Routine You Only Do Once a Month
DIY isn’t just about fixing what’s broken—it’s also about preventing problems before they get big and expensive. A short monthly check-in can help you catch small issues early and keep your space safer and more comfortable.
What you’ll need:
- Your fix-it kit (from Tip 1)
- A notepad or notes app on your phone
- 15–20 minutes, once a month
Step-by-step:
- Pick a consistent reminder day.
For example, the first Saturday of every month or the last weekday evening. Add it as a repeating event on your calendar.
- Walk through your home with “repair eyes.”
Slowly check each room and look specifically for:
- Loose handles, knobs, or hinges
- Burned-out or dim lightbulbs
- Dripping faucets or running toilets
- Peeling caulk around sinks and tubs
- Cracks or gaps in weatherstripping around doors/windows
- Fix what takes under five minutes.
Tighten loose screws, replace a bulb, stick down a loose corner of rug tape—use your fix-it kit to handle quick wins immediately.
- List anything that needs supplies or more time.
In your notes, write down:
- What the issue is
- Where it is
- What you think you’ll need (e.g., “Bathroom sink: need new caulk,” or “Front door: new weatherstripping”)
- Assign one small project to the coming week.
Choose a single item from your list to tackle fully. Keep it modest: re-caulking one edge of a tub, replacing one showerhead, or sealing one drafty window.
- Include safety checks occasionally.
Every few months, add:
- Testing smoke and carbon monoxide alarms
- Checking that power strips aren’t overloaded
- Looking for signs of water leaks around sinks and ceilings
- Track your wins.
Keep a running list of “things I’ve fixed” in your notes. Watching that list grow is a powerful confidence booster.
This habit is what quietly turns you into “the handy person” in your home—without marathon project days or renovation-level effort.
Conclusion
You don’t need a workshop, a huge budget, or a full weekend to start feeling capable with DIY. A small fix-it station, tamed cables, a few smart hooks, peel-and-stick upgrades, and a simple monthly check-in can dramatically improve both how your home feels and how confident you feel in it.
Start with the tip that feels easiest or most satisfying right now. Once you see the difference from that single change, you’ll naturally be ready for the next one. DIY confidence doesn’t appear all at once—it builds quietly, one small solved problem at a time.
Sources
- [U.S. Department of Energy – Home Weatherization and Energy Efficiency](https://www.energy.gov/energysaver/weatherize) – Guidance on sealing drafts and improving home comfort and efficiency
- [Consumer Product Safety Commission – Smoke Alarms and Home Safety](https://www.cpsc.gov/Safety-Education/Safety-Guides/home) – Recommendations for regular safety checks in the home
- [Family Handyman – Essential Tools for the Homeowner](https://www.familyhandyman.com/list/essential-tools-for-homeowners/) – Practical overview of basic tools useful for a household fix-it kit
- [IKEA – Wall Storage and Organization Ideas](https://www.ikea.com/us/en/rooms/hallway/how-to-organize-your-entryway-pub1a7de0a4) – Inspiration and examples of using walls, hooks, and rails for everyday organization
- [This Old House – Guide to Caulks and Sealants](https://www.thisoldhouse.com/painting/21015122/all-about-caulks-sealants) – Clear explanations of where and how to use caulk for small maintenance tasks