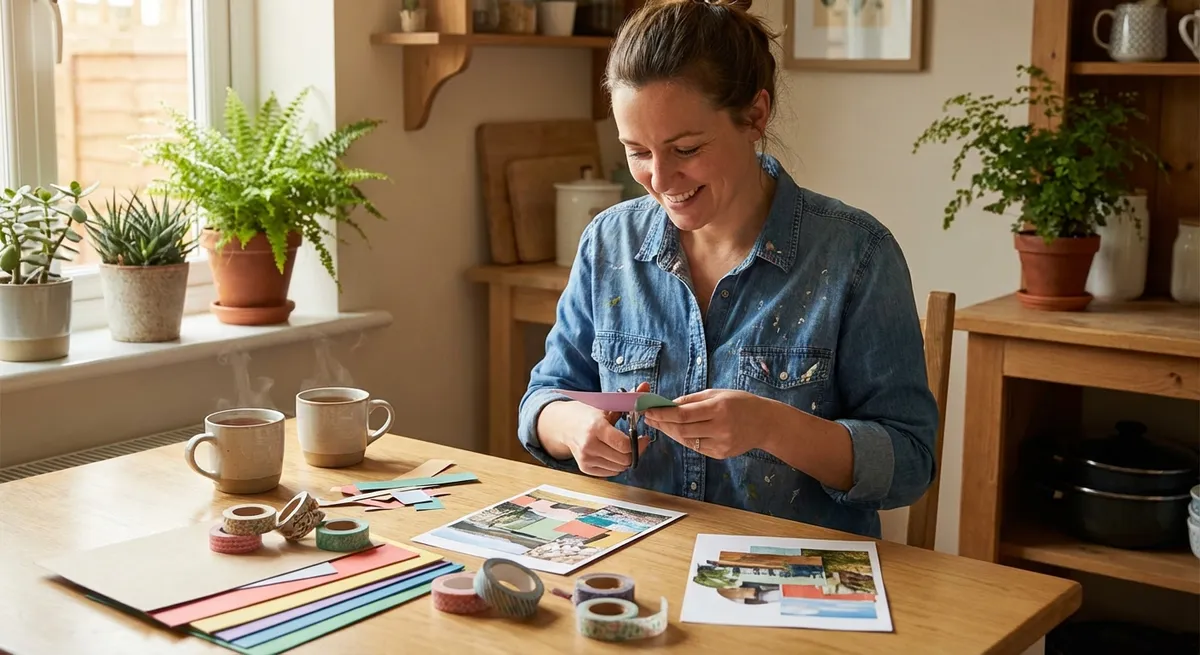
Tip 1: Start with a One-Jar Project (Easy Pencil & Tool Holder)
A single clean jar can become a desk organizer, makeup brush holder, or kitchen tool caddy in under 20 minutes. This is a great “first win” craft because it’s low-risk and genuinely useful.
You’ll need:
- 1 clean glass jar (pasta sauce, jam, etc.)
- Dish soap and sponge
- Rubbing alcohol or vinegar
- Acrylic craft paint or spray paint (optional)
- Washi tape, twine, stickers, or ribbon (optional)
- Old newspaper or cardboard to protect your work surface
Step-by-step:
- Prep the jar: Wash the jar with warm, soapy water and remove the label. If glue remains, rub it with a little oil, then wash again. Let it dry completely.
- Degrease the surface: Wipe the outside with rubbing alcohol or vinegar so paint or tape sticks better.
(Optional) Paint the base:
- If using acrylic paint: Use a soft brush and apply a thin coat. Let dry 20–30 minutes. Add a second coat if needed. - If using spray paint: Take it outside or to a well-ventilated area. Shake the can well and spray light coats, rotating the jar. Let dry fully according to the can instructions. 4. Add simple decoration: Wrap washi tape around the bottom third of the jar, tie twine or ribbon around the neck, or add a few stickers. Keep it simple—clean, minimal designs often look the most “intentional.” 5. Put it to work: Use it for pens, kitchen spatulas, paintbrushes, or even as a small planter sleeve (just drop a small potted plant inside).
Why this builds confidence: It’s hard to “ruin” a jar, you get something useful immediately, and you can always repaint or re-wrap it if you change your mind.
Tip 2: Make No-Sew Fabric Coasters from Old Clothes
If you have an old shirt or pillowcase you love but can’t wear anymore, turn it into coasters. This project gives fabric a second life and requires no sewing skills.
You’ll need:
- Clean cotton or linen fabric (old shirt, pillowcase, or tea towel)
- Scissors (fabric scissors if you have them)
- Cardboard or thin cork (from a shipping box or craft sheet)
- Craft or fabric glue
- Ruler and pencil
- Something heavy (book or pan) for pressing
Step-by-step:
- Create a template: Draw 4-inch (about 10 cm) squares on cardboard or cork and cut them out. These will be your coaster bases.
Cut fabric pieces:
- Lay fabric flat. - Trace around each base, leaving about ½ inch extra all around. - Cut out the fabric squares.
Glue fabric to base:
- Apply a thin, even layer of glue on one side of the cardboard/cork. - Place it sticky-side down onto the wrong (back) side of the fabric, centered so you have extra fabric on all sides.
Wrap the edges:
- Snip the fabric corners diagonally so they don’t overlap too thickly. - Fold the fabric edges over the back of the base and glue them down firmly.
Press and dry:
- Place the finished coasters under a flat, heavy object (like a book) on a protected surface. - Let dry according to the glue’s instructions (usually a few hours). 6. Optional finishing touch: If you want a smoother base, glue a slightly smaller piece of felt or fabric to the back to cover the raw edges.
Why this builds confidence: You work with familiar materials (clothes, cardboard), learn basic cutting and gluing techniques, and end up with something that looks store-bought with just a bit of patience.
Tip 3: Create a Simple Wall “Gallery Strip” Without Drilling
If you’re renting or hesitant to put holes in your walls, a removable “gallery strip” lets you display photos, postcards, or small art prints without power tools or commitment.
You’ll need:
- Painter’s tape or removable mounting tape
- String, twine, or thin ribbon
- Mini clothespins or paper clips
- Scissors
- Lightweight photos, cards, or small prints
Step-by-step:
- Pick your location: Choose a smooth section of wall away from moisture and direct sunlight. Over a desk or dresser works well.
- Measure your strip: Decide how wide you want your display. For most spaces, 2–3 feet (60–90 cm) is enough.
- Cut the twine or ribbon: Add an extra 4–6 inches beyond your chosen width so you have some slack for tying or taping.
Attach the ends:
- Fold small loops at each end of the string. - Use painter’s tape or removable mounting tape to secure each loop to the wall. - The string should hang with a slight gentle curve, not tight and straight. 5. Clip on your items: Use mini clothespins or paper clips to hang photos, ticket stubs, recipe cards, or notes along the string. Space them evenly for a clean look. 6. Adjust as needed: Shift items around until the spacing and balance feel right. You can easily change the display with seasons or moods.
Why this builds confidence: It’s fully reversible, no tools required, and instantly changes the feel of a room. You practice measuring, arranging, and styling—key skills for more advanced DIY projects.
Tip 4: Turn a Plain Notebook into a Personalized Planner
Customizing a notebook is an easy way to practice layout, design, and simple decorative techniques. You’ll walk away with a planner, recipe book, idea journal, or project tracker that actually fits your life.
You’ll need:
- 1 plain notebook or composition book
- Ruler and pencil
- Colored pens or markers
- Washi tape or stickers (optional)
- Scrap paper or sticky notes
Step-by-step:
- Choose a purpose: Decide if this notebook will be a planner, habit tracker, project log, or idea journal. Having a clear purpose makes design decisions easier.
Make a simple index:
- Reserve the first 1–2 pages for an index or table of contents. - Number your pages lightly in pencil at the bottom corners.
Design your first layout:
- For a planner: Divide two facing pages into 7 boxes (one for each day). - For a project notebook: Use one side for “Ideas/Plans” and the other for “Steps/Progress.”
Use washi tape as guides:
- Place strips of washi tape to create headers or borders. - Write section titles on or above the tape (e.g., “To-Do,” “Notes,” “This Week”).
Add simple icons:
- Use the same symbol for repeated items (e.g., a small square for tasks, a star for priority items, a circle for events). - This makes your notebook easier to scan and more satisfying to use.
Test and adjust:
- Use your notebook for a few days. - Note what you actually use and what you ignore. - The next pages can evolve based on what works, so there’s no pressure to make it “perfect” right away.
Why this builds confidence: You’re crafting something you’ll interact with daily, and you get comfortable with iteration—improving as you go instead of waiting for a flawless plan.
Tip 5: Build a Simple DIY “Craft Kit” So You’ll Actually Keep Creating
Having basic supplies in one place makes it far easier to say “yes” to a small project when you have 15–30 spare minutes. Think of this as your personal starter toolbox for future ideas.
You’ll need:
- A shoebox, small bin, or lidded container
- Basic supplies (start small and add over time):
- Scissors
- Glue stick and/or craft glue
- Tape (clear tape and/or painter’s tape)
- A small set of colored pens or markers
- Pencil and eraser
- A few sheets of blank paper or index cards
- A short length of twine or ribbon
- A roll of washi tape (optional)
Step-by-step:
- Choose your container: Pick something easy to carry and simple to store on a shelf or under a bed. Label it “Craft Kit” so you (and anyone else at home) know what’s inside.
- Add the basics first: Place scissors, glue, tape, pens, pencil, and paper in the box. These alone can handle a surprising number of projects.
Include a “scrap stash”:
- Add a small envelope or zip bag for scraps: leftover ribbon, interesting packaging, magazine cutouts, or fabric bits. - Limit yourself to what fits in the bag so it stays manageable.
Keep simple instructions inside:
- Write or print 3–5 very small project ideas on an index card (for example, “decorate a jar,” “make a bookmark,” “create a gratitude card”). - When you have a few minutes, pick one card and follow it.
Store it where you’ll see it:
- Avoid hiding it in a hard-to-reach closet. - A visible shelf, under a coffee table, or near your desk is ideal. 6. Refresh monthly: Once a month, take 5 minutes to remove dried-out pens, toss scraps you won’t use, and add any new materials you’ve collected.
Why this builds confidence: Reducing the friction between “I want to make something” and “I’m actually starting” is huge. With a kit ready, you’re far more likely to finish small, satisfying projects instead of just saving ideas.
Conclusion
Crafting doesn’t have to be complicated, expensive, or intimidating. Small, practical projects—like decorating a jar, making no-sew coasters, hanging a gallery strip, customizing a notebook, and building a simple craft kit—are enough to shift you from “I can’t” to “I did.” Every finished project, no matter how simple, is proof that you can learn new skills and create things that make your home and day-to-day life feel a little more yours.
Pick one of these tips and complete it this week. Don’t wait for the “perfect” time or the “perfect” supply list. Start where you are, with what you have, and let each small success build your craft confidence step by step.
Sources
- [Michaels: Craft Ideas & How-To Projects](https://www.michaels.com/ideas) – Inspiration and tutorials for beginner-friendly crafts using common supplies
- [Joann: Learn with Joann – How-To Projects](https://www.joann.com/howto) – Step-by-step guides for fabric, paper, and home décor projects
- [Crayola: Crafts for Kids & Families](https://www.crayola.com/crafts) – Simple, accessible craft ideas that use basic household and art materials
- [Goodwill Industries: DIY & Upcycling Ideas](https://www.goodwill.org/blog/category/shop/diy) – Practical ways to repurpose everyday items and secondhand finds into DIY projects
- [HGTV Handmade: DIY Crafts](https://www.hgtv.com/design/make-and-celebrate/handmade) – Visual tutorials and tips for approachable, stylish crafts suitable for beginners