Below are five beginner-friendly DIY tips, each with clear steps so you can choose one project and actually complete it.
Tip 1: Create a Catch-All Entry Zone That Tames Daily Clutter
That pile of keys, mail, bags, and random “stuff” by the door? You can fix it with a simple, DIY entry zone—even if you rent.
What you’ll need (adjust based on your space):
- Command hooks or simple wall hooks
- A small shelf, wall-mounted organizer, or narrow table
- Small tray or bowl
- Baskets or bins for shoes or grab-and-go items
- Measuring tape and pencil
Step-by-step:
Define the spot
Pick the exact place where everything naturally gets dumped (near the door, by the kitchen, etc.). You’re not fighting the habit—you’re organizing it.
Measure your wall and floor space
Use a measuring tape to note how wide and tall your area is. This prevents buying or mounting things that don’t fit.
Add hooks at realistic heights
Install adhesive hooks (great for renters) or screw-in hooks for coats, bags, and backpacks. - Standard coat hook height: about 66–70 inches from the floor. - Add a lower hook for kids if needed.
Create a “landing pad” for small items
Place a small shelf, narrow table, or wall-mounted organizer under or beside the hooks. Add a tray or bowl for keys, wallets, and sunglasses. Make this the one and only spot for them.
Contain the floor clutter
Add 1–2 baskets or shallow bins for shoes, pet leashes, or reusable bags. Label them if that helps everyone remember what goes where.
Test and adjust for a week
Live with your setup. If something still ends up on the floor or counter, ask: “What didn’t get its own home?” Then add one more hook, bin, or tray.
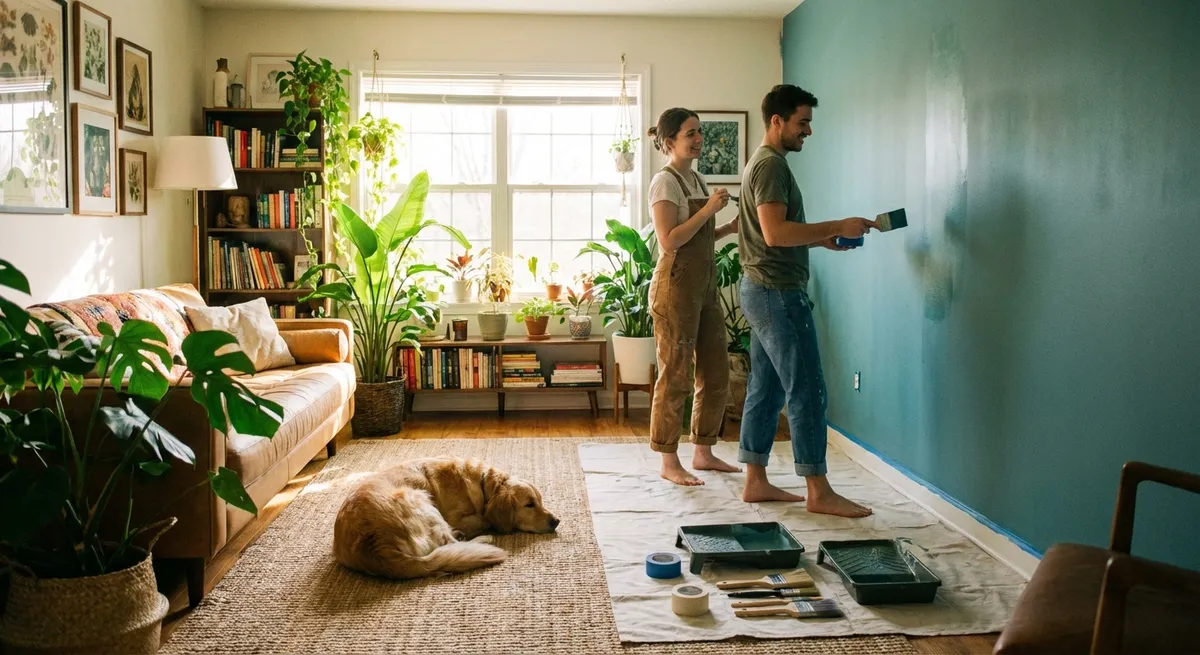
Tip 2: Paint a Simple Accent Area Without Overhauling a Room
You don’t need to repaint an entire room to make it feel different. A small accent wall—or even just a painted “zone”—can change the mood in a day.
What you’ll need:
- Painter’s tape
- Drop cloth or old sheet
- Roller and small brush
- Interior wall paint (sample or quart can work for a small area)
- Stir stick and paint tray
Step-by-step:
Choose a low-risk area
Good candidates: behind a sofa, around a desk, behind a bed, or a corner reading nook. Smaller space = less stress.
Pick a color with a purpose
- Cozy: warm neutrals (soft beige, terracotta, warm gray) - Calm: blues or blue-grays - Energizing: soft yellows or muted greens Bring home sample chips or use a sample jar to test a patch first.
Prep the wall
Wipe it down with a damp cloth to remove dust and oils. Let it dry fully. If there are nail holes, patch and lightly sand them.
Tape your edges carefully
Use painter’s tape along baseboards, ceiling lines, and corners. Press down firmly with your fingernail or a plastic card so paint doesn’t bleed.
Cut in the edges, then roll
- Use a small brush to paint along taped edges ("cutting in"). - Use a roller for the main area, working in small sections and overlapping slightly. Apply thin coats; two light coats usually look better than one heavy one.
Remove tape before it’s fully dry
When the paint is still slightly tacky, carefully peel off the tape at a 45° angle. This helps you get cleaner lines.
Let it cure and style the space
After the paint is dry, add a piece of art, a mirror, or a shelf in that new accent area so it looks intentional and finished.
Tip 3: Build a No-Fuss Cleaning Caddy So Tidying Takes Less Time
Cleaning feels bigger when you’re hunting for supplies. A portable caddy simplifies the job and makes quick cleanups realistic.
What you’ll need:
- Sturdy caddy, tote, or small bucket with handle
- All-purpose cleaner (or vinegar + water mix for many surfaces)
- Glass cleaner or vinegar + water in a spray bottle
- Microfiber cloths
- Scrub brush or sponge
- Rubber gloves (optional but helpful)
Step-by-step:
Pick a dedicated container
Use a plastic caddy, handled basket, or even a small bucket. The key: everything must fit and be easy to carry.
Choose a simple, multi-use cleaner
Include: - All-purpose cleaner for counters and most surfaces - Glass cleaner for mirrors and windows - Disinfecting wipes or spray for high-touch areas (light switches, handles)
Add the right tools, not all the tools
- 3–4 microfiber cloths in different colors (bath, kitchen, general, glass) - One scrubbing sponge or brush - Dusting cloth or small duster
Create mini “zones” inside your caddy
Group by use: bathroom items on one side, kitchen/general on the other. This makes it easier to grab what you need quickly.
Store it where you actually clean
Place the caddy in a central but hidden spot: under the kitchen sink, in a hallway closet, or bathroom cabinet. Accessibility matters more than aesthetics here.
Use it for fast 10-minute resets
When the house feels chaotic, grab the caddy and do one quick pass: - Wipe counters - Spot-clean mirrors - Hit doorknobs and light switches This tiny system adds up over time.
Tip 4: Upgrade a Drawer With Simple, DIY Organizers
Instead of buying expensive organizers, you can customize a chaotic drawer (kitchen, desk, or bathroom) with what you already have.
What you’ll need:
- Empty boxes (cereal, pasta, tea, or shoe boxes)
- Scissors or utility knife
- Ruler or tape measure
- Optional: decorative paper or contact paper, tape or glue
Step-by-step:
Choose one drawer only
Don’t try to organize the whole kitchen or desk. Start with the drawer that annoys you the most.
Empty and sort
- Pull everything out. - Group items: “everyday use,” “sometimes,” “never.” - Toss or donate what you don’t actually use.
Measure your drawer
Note width, depth, and height. This helps you cut boxes that fill the space instead of sliding around.
Cut boxes into trays
- Use shallow boxes (or cut down taller ones) to about 2–3 inches high. - Mix sizes to create “pockets” for different items—pens, utensils, makeup, etc.
Dress them up (optional but fun)
Wrap the boxes in decorative paper, contact paper, or leftover gift wrap. Tape or glue the edges inside the box.
Arrange trays snugly
Fit them into the drawer like a puzzle. You want minimal gaps so items don’t slide around. Adjust and trim if needed.
Assign a spot for every category
Put similar items in the same tray. Commit: everything must have a “home.” This is what keeps the drawer organized more than any fancy product.
Tip 5: Refresh Lighting With Simple Bulb and Shade Swaps
Lighting changes how a room feels more than almost anything else—and you can improve it without rewiring or major tools.
What you’ll need:
- Replacement light bulbs (LED recommended)
- Optional: new lamp shade or plug-in wall sconce
- Step stool (if needed)
- Soft cloth for cleaning
Step-by-step:
Identify your “dark” or harsh spots
Walk through your home at night. Notice where it feels: - Too dim (hard to read or work) - Too harsh (clinical or glaring) Pick one area to improve.
Choose the right bulb temperature
Look at “Kelvin” (K) on the box: - 2700–3000K: warm, cozy light (good for bedrooms, living rooms) - 3500–4100K: neutral white (good for kitchens, work areas) - 5000K+: bright daylight (good for task lighting, garages, craft spaces)
Upgrade to LEDs if you haven’t already
They last longer and use less energy. Match brightness by “lumens,” not just watts—higher lumens = brighter light.
Swap bulbs safely
Turn off the light and let old bulbs cool. Use a step stool if needed and hold the base of the bulb, not just the glass.
Clean existing fixtures and lamps
Dust and wipe shades and covers with a soft cloth. You’ll be surprised how much brighter things feel just from removing dust.
Consider a plug-in fixture for dark corners
If you can’t hardwire a light (especially in rentals), try: - Plug-in wall sconces - Clip-on lamps for shelves or headboards - Floor lamps with adjustable heads
Test at night and fine-tune
Sit in the room after dark and see how it feels. You may just need one more soft lamp or a warmer bulb to make the space feel inviting instead of stark.
Conclusion
Home projects don’t have to be dramatic to make a real difference. A tidy entry zone, a single painted accent area, a ready-to-go cleaning caddy, one organized drawer, or softer lighting can all shift how your home feels—and how stressed you feel in it.
Pick just one of these tips, set a realistic time limit (like “one Saturday morning”), and let yourself be a beginner. Every small finished project is proof that you can shape your space, one calm weekend at a time.
Sources
- [U.S. Department of Energy – Lighting Choices to Save You Money](https://www.energy.gov/energysaver/lighting-choices-save-you-money) - Helpful overview of bulb types, brightness (lumens), and color temperature for better home lighting
- [Mayo Clinic – Tips to Reduce Household Clutter](https://www.mayoclinic.org/healthy-lifestyle/stress-management/in-depth/clutter/art-20488866) - Explains how clutter affects stress and offers simple decluttering strategies
- [Consumer Reports – Interior Paint Buying Guide](https://www.consumerreports.org/paints/how-to-choose-interior-paint-a5720260361/) - Guidance on choosing paint types and finishes for different rooms and projects
- [Good Housekeeping – Cleaning Supplies Checklist](https://www.goodhousekeeping.com/home/cleaning/tips/a20758/basic-cleaning-supplies/) - Practical list of basic cleaning tools and products for building a cleaning caddy
- [University of Minnesota Extension – Home Storage and Organization](https://extension.umn.edu/organizing-your-home/home-storage-and-organization) - Evidence-based tips on organizing home spaces and reducing clutter