Fix 1: Quiet a Squeaky Door in Under Five Minutes
A squeaky door can make your whole home feel noisy and worn out, but it’s one of the fastest fixes you can learn.
You’ll need:
- Lubricant (WD‑40, silicone spray, or cooking oil in a pinch)
- Paper towel or rag
Step-by-step:
- Identify the squeak. Slowly open and close the door and listen—most squeaks come from the hinge pins.
- Protect nearby surfaces. Place a paper towel or rag under the hinges to catch drips.
- Apply a small amount of lubricant.
- If using a spray: Use the straw nozzle if available, and spray directly onto the hinge where the pin meets the hinge plate.
- If using oil: Dip a cotton swab or a corner of a paper towel and dab it onto the hinge joint.
- Work the door back and forth. Open and close the door 10–15 times to help the lubricant work into the hinge.
- Wipe off excess. Remove any drips so they don’t attract dust.
- Listen and repeat if needed. If it’s still squeaky, add a bit more and work the door again.
Encouragement tip: This is a perfect “first fix” if you’re nervous about DIY. It’s quick, low-risk, and the instant improvement is a real confidence booster.
Fix 2: Stop a Wobbly Chair (or Table) with What You Already Have
A wobbly chair or table makes everything feel unstable—literally. The good news: you can usually fix it with simple tightening and a small shim.
You’ll need:
- Screwdriver (Phillips or flat-head, depending on your furniture)
- Wood glue (optional but helpful)
- Cardboard, felt pad, or folded paper as a shim
- Damp cloth
Step-by-step:
- Flip the furniture over carefully. Place it on a soft surface (like a rug) to avoid scratches.
- Check all screws and bolts. Gently try to move each leg. If you see loose screws or bolts, tighten them with your screwdriver.
- Test the wobble again. Flip the piece upright and test. Sometimes tightening alone solves the problem.
- Find the “short” leg. If it still wobbles, gently press down on each corner until you find the one that doesn’t fully touch the floor.
- Add a temporary shim.
- Cut a small piece of cardboard or fold a piece of paper.
- Slide it under the short leg.
- Once you’re happy with the stability, trace around the leg on the shim for a better fit.
- Make it more permanent.
- Use a felt pad (often sold as “furniture pads”) or a thicker, neatly cut piece of cardboard.
- Attach it to the bottom of the leg with a bit of wood glue or strong double-sided tape.
- Clean up. Wipe off any visible glue with a damp cloth before it dries.
Encouragement tip: It doesn’t have to look perfect to work well. Practical fixes that make your space safer and calmer absolutely “count” as DIY.
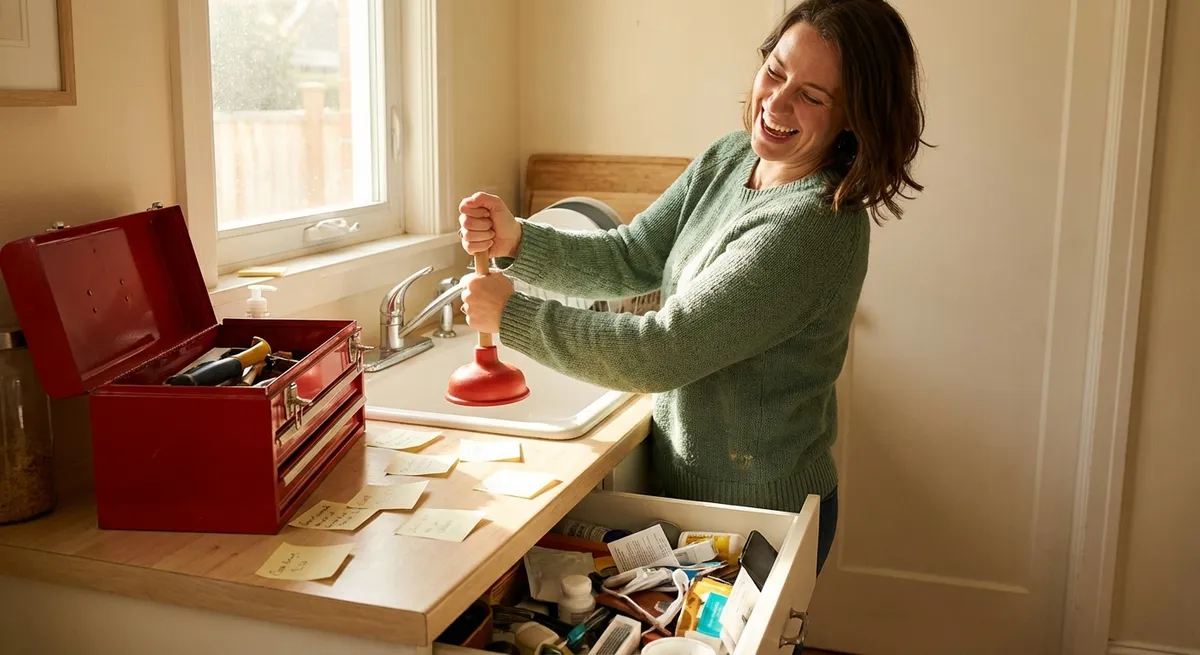
Fix 3: Unclog a Slow Drain Without Harsh Chemicals
A sink that takes forever to drain can make basic tasks like washing dishes or brushing your teeth frustrating. You can often clear minor clogs with hot water, simple tools, and a bit of patience.
You’ll need:
- Kettle or large pot for hot water
- Baking soda (about ½ cup)
- White vinegar (about 1 cup)
- Rubber gloves
- Old toothbrush or small brush
- Plunger (optional but useful)
Step-by-step (for bathroom or kitchen sink):
- Clear the area. Remove any visible debris from the drain (hair, food scraps, etc.) using a paper towel. Wear gloves if possible.
- Flush with hot water.
- Heat water until it’s hot but not boiling (especially important for PVC pipes).
- Slowly pour it down the drain to soften grease and soap buildup.
- Add baking soda. Pour about ½ cup directly into the drain. If it doesn’t all go in, gently push it with a spoon handle.
- Add vinegar. Pour about 1 cup of white vinegar into the drain. It will fizz—that’s normal and helps break down buildup.
- Let it sit. Wait 10–15 minutes to let the mixture work.
- Flush again with hot water. Pour another kettle of hot water down the drain to clear loosened debris.
- If still slow, try plunging.
- Cover the overflow hole (often near the top of the sink) with a wet cloth.
- Place the plunger over the drain and plunge with steady, firm strokes for 20–30 seconds.
- Test the drain. Run water and see if it flows better. You can repeat the baking soda/vinegar step once more if needed.
Encouragement tip: Even partially improving the drain is a win. You’ve just learned a gentle method you can reuse before calling in a pro.
Fix 4: Remove a Stuck Zipper Without Ruining the Fabric
When a zipper jams, it can make you want to toss the bag or clothing item entirely. Instead, a little lubrication and patience can bring it back to life.
You’ll need:
- Graphite pencil, bar of soap, lip balm, or petroleum jelly
- Cotton swab (if using a softer product)
- Paper towel
Step-by-step:
- Stop pulling hard. Forcing the zipper can break teeth or pull it off track. Gently set it back to where it first got stuck.
- Inspect the area. Look for fabric or thread caught in the teeth. If you see any, gently pull it out with your fingers or tweezers.
- Choose your “lubricant.”
- For clothes: try a graphite pencil (rub the tip on the teeth) or a small amount of bar soap.
- For bags or less delicate items: a tiny bit of lip balm or petroleum jelly works well.
- Apply carefully.
- If using a pencil: rub the tip along both sides of the stuck teeth.
- If using balm/jelly: apply a tiny amount to a cotton swab and dab only on the zipper teeth—not the fabric.
- Gently work the zipper.
- Wiggle the pull tab up and down in short, small movements instead of one big tug.
- As it starts to move, pull it a little farther each time.
- Wipe away residue. Use a paper towel to remove any extra product so it doesn’t transfer to clothing or contents.
- Test a few times. Run the zipper up and down fully to make sure the motion is smooth.
Encouragement tip: This fix is small but powerful—it can save a favorite jacket, backpack, or suitcase in minutes and remind you that “repair” is often better than “replace.”
Fix 5: Patch Small Wall Holes So They Practically Disappear
Nail holes and tiny dings can make walls look tired, but you can hide them quickly with basic supplies. This is a satisfying, beginner-friendly fix that makes a big visual difference.
You’ll need:
- Spackling paste or lightweight wall filler
- Putty knife or an old, flat plastic card
- Fine-grit sandpaper (around 220-grit)
- Damp cloth or sponge
- Touch-up paint (optional but ideal)
Step-by-step:
- Clean the area. Wipe around the hole with a damp cloth to remove dust and loose paint. Let it dry.
- Apply spackle.
- Scoop a small amount of spackling paste onto your putty knife or card.
- Press it into the hole, then scrape across the surface to smooth it out.
- Thin out the edges. Angle your putty knife and lightly drag it across the patch so it’s level with the wall, not raised.
- Let it dry completely. Follow the product directions—many lightweight fillers dry within 30–60 minutes for small holes.
- Lightly sand the patch.
- Use fine-grit sandpaper to smooth the area.
- Wipe away dust with a damp cloth.
- Touch up with paint (if you have it).
- Use leftover wall paint for the best match.
- Apply a thin coat with a small brush or foam brush, feathering the edges into the existing wall color.
- Check it in different lighting. Once dry, look at the patch during the day and at night. If you see uneven texture, you can add a second thin layer of spackle, sand again, and repaint.
Encouragement tip: Don’t stress if the first patch isn’t invisible. Even pros sometimes need two passes. Each attempt improves your feel for how much filler to use and how to smooth it.
Conclusion
The more small problems you fix, the more your home starts to feel like it’s really working for you. You just quieted a squeak, steadied your furniture, cleared a drain, rescued a zipper, and refreshed your walls—all with basic tools and everyday items. That’s real DIY progress.
You don’t need to tackle everything at once. Pick one quick fix that’s been bothering you the most and try it today. Every small win builds your skills, your confidence, and your sense that you can handle the next thing that pops up.
Sources
- [Home Depot: How to Fix Squeaky Door Hinges](https://www.homedepot.com/c/ah/how-to-fix-a-squeaky-door/9ba683603be9fa5395fab901fd1f0c8) - Step-by-step guidance and product options for lubricating hinges
- [Consumer Product Safety Commission: Furniture and TV Tip-Over Information](https://www.cpsc.gov/Safety-Education/Safety-Education-Centers/Tipover-Information-Center) - Background on why stabilizing furniture matters for safety
- [U.S. Environmental Protection Agency: Safer Choice—Household Drain Maintenance](https://www.epa.gov/saferchoice/what-safer-choice-label) - Information on safer product choices and why to limit harsh drain chemicals
- [University of Nebraska–Lincoln: Clothing Zippers—Use and Care](https://extensionpublications.unl.edu/assets/html/g1976/build/g1976.htm) - Tips on zipper function, care, and basic troubleshooting
- [Lowe’s: How to Patch and Repair Drywall](https://www.lowes.com/n/how-to/patch-and-repair-drywall) - Visual and written instructions for patching holes and finishing walls