Below are five quick fixes almost anyone can do, even if you’ve never picked up a tool before.
Silence That Dripping Faucet (Without Calling a Plumber)
A slow drip doesn’t just waste water—it also quietly raises your bill and your stress level. The good news: many basic faucets can be calmed down in under 30 minutes.
You’ll need:
- Adjustable wrench (or a set of wrenches)
- Screwdriver
- Replacement washer or cartridge (depending on faucet type)
- Old towel
- Small container or tray for parts
Step-by-step:
Turn off the water
Look under the sink for two small shutoff valves (hot and cold). Turn them clockwise until they stop. Open the faucet to confirm the water is off.
Plug the drain
Use the sink stopper or a rag. This keeps tiny screws or washers from disappearing forever down the drain.
Disassemble the handle
- Most handles have a decorative cap hiding a screw. - Gently pry off the cap with a flathead screwdriver or your fingernail. - Remove the screw and lift off the handle.
Inspect the faucet type
You’ll usually see either: - A stem and rubber washer (compression faucet), or - A single cartridge unit (cartridge faucet).
Replace the worn part
- For washer-style faucets: - Use the wrench to remove the stem. - Unscrew the small rubber washer at the bottom. - Replace it with a matching new washer. - For cartridge faucets: - Pull out the cartridge (it may have a clip—remove it carefully). - Replace with the same model cartridge (take the old one to the hardware store if you’re not sure).
Reassemble carefully
Put everything back in the reverse order you removed it. Tighten screws snugly but don’t over-tighten—too much force can crack parts.
Turn water back on slowly
Turn the shutoff valves counterclockwise. Test the faucet. A brief sputter is normal—air is clearing from the line. Then watch for drips.
If it still drips, double-check you’ve used the right part and that it’s seated correctly. Most basic drips are solved with just this.
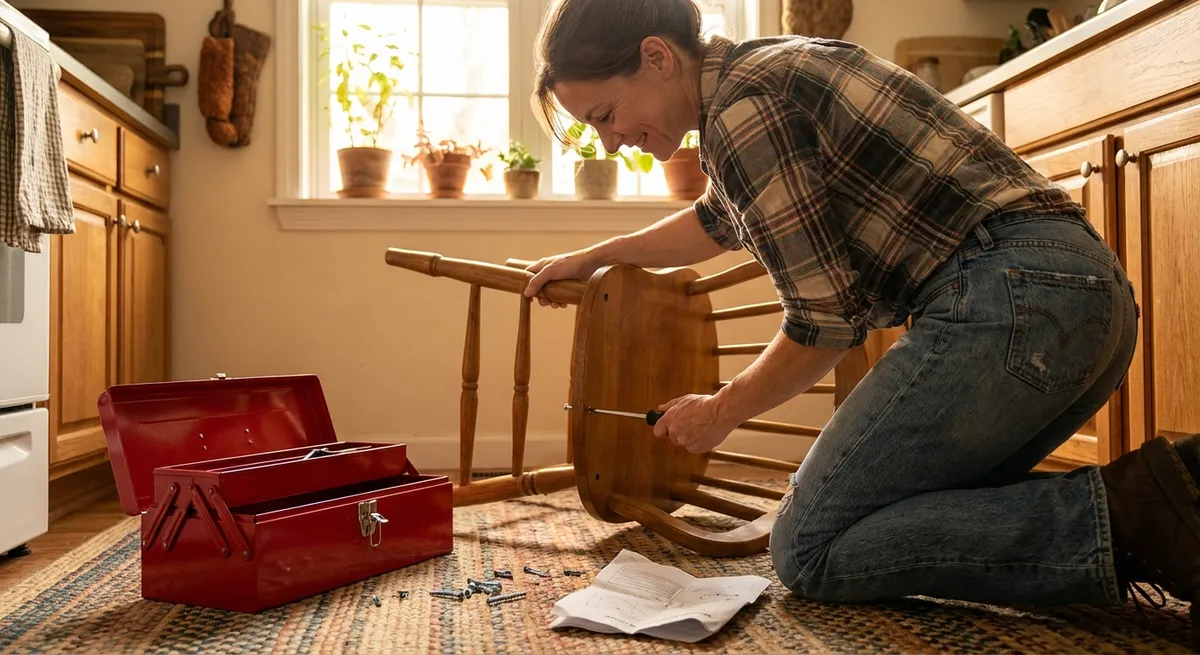
Fix a Wobbly Chair or Table So It Feels Solid Again
That one wobbly seat everyone avoids? You can fix it with just glue, patience, and a little pressure.
You’ll need:
- Wood glue (interior use is fine for indoor furniture)
- Clamps (or strong rope/ratchet straps if you don’t have clamps)
- Damp cloth
- Small brush or cotton swab
Step-by-step:
Flip it and find the movement
Turn the chair or table upside down on a flat surface. Gently press or wiggle each leg and joint to see where it’s loose.
Loosen the joint slightly (if needed)
If the joint is only a little loose, try gently twisting or pulling just enough to create a small gap. Don’t force it—the goal is to open space for glue, not to break it.
Apply wood glue into the joint
- Use a small brush, cotton swab, or even a piece of cardboard to work glue into the gap. - Make sure it coats both surfaces where wood meets wood.
Clamp it tight
- Use clamps to pull the joint snug again. - If you don’t have clamps, wrap the chair or table tightly with a rope or a ratchet strap to hold it in place. - Check that the leg aligns correctly and the piece sits level.
Wipe off excess glue
Use a damp cloth to remove glue squeeze-out before it dries. This keeps the repair looking neat.
Let it cure fully
Most wood glues need at least 30 minutes to set and several hours to cure. For best strength, leave it clamped overnight and avoid using the furniture until then.
A single evening of drying turns that “don’t sit there” chair into something solid you can trust again.
Stop a Squeaky Door So It Opens Quietly Every Time
That squeak you hear every time someone gets a snack at midnight? Completely optional. You can usually fix it in minutes.
You’ll need:
- Lubricant: silicone spray, lithium grease, or even petroleum jelly in a pinch
- Rag or paper towels
- Old towel or cardboard for the floor
Step-by-step:
Protect the floor
Lay a towel or piece of cardboard under the door hinges to catch drips.
Identify the exact squeak point
Slowly open and close the door while listening. It’s almost always the hinge pin rubbing against the hinge.
Apply a small amount of lubricant
- If using spray lubricant, insert the small straw and aim directly at the hinge pin and moving parts. Use short bursts—less is more. - If using grease or petroleum jelly, rub a thin layer on the visible hinge joints.
Work the door back and forth
Open and close the door several times so the lubricant spreads through the hinge. You should hear the squeak fade.
Wipe away excess
Any drips or extra lubricant can attract dust. Wipe with a rag until it looks clean.
If the squeak returns after a day, repeat the process and use a slightly heavier lubricant like white lithium grease.
Patch a Small Wall Hole So It Practically Disappears
Tiny wall holes from nails or screws make a space feel more “unfinished” than it really is. You don’t need major drywall skills to smooth them out.
You’ll need:
- Lightweight spackle or wall repair compound
- Putty knife or old plastic card
- Fine-grit sandpaper (around 220 grit)
- Damp sponge or cloth
- Matching wall paint and small brush (if available)
Step-by-step:
Clean the area
Wipe away any dust or loose bits of drywall with your hand or a dry cloth. For slightly bigger holes, gently scrape edges flat with a putty knife.
Apply the spackle
- Scoop a small amount onto your putty knife. - Press it into the hole, then smooth the surface so it’s level with the wall. - For holes larger than a nail (like from wall anchors), you may need to apply in two thin layers.
Feather the edges
Pull the knife outward from the center so the spackle is thinnest at the edges. This helps it blend into the wall and reduces sanding.
Let it dry completely
Follow the product’s dry time (often 30 minutes to a few hours, depending on depth and humidity).
Lightly sand for smoothness
Use fine-grit sandpaper and a light touch. You’re just knocking down high spots, not digging into the wall. Wipe away dust with a damp cloth.
Touch up with paint
- If you have leftover wall paint, dab a small amount over the repair with a brush or foam applicator. - Let it dry and assess. A second thin coat usually blends it almost perfectly.
Small holes vanish quickly, and the wall instantly looks cleaner and more intentional.
Re-Caulk a Leaky Sink Edge to Keep Water Out
Cracked or missing caulk around a sink or countertop lets water sneak into places it shouldn’t, leading to mold, swelling, and stains. A fresh bead of caulk looks clean and protects your home.
You’ll need:
- Kitchen/bathroom caulk (look for “mold-resistant” or “for bath & kitchen”)
- Caulk gun (if using standard tubes)
- Utility knife or caulk remover tool
- Painter’s tape (optional but very helpful)
- Paper towels or rag
- Bowl of water and a small amount of dish soap (if smoothing with your finger)
Step-by-step:
Remove old caulk
- Carefully cut along both edges of the old caulk line with a utility knife. - Peel away what you can. Use a caulk remover tool or the back of a plastic spoon to scrape off remaining bits. - Wipe the area clean and dry thoroughly.
Optional: tape the edges for a neat line
- Place painter’s tape about 1/8" from where your new caulk line should land, on both sides of the joint. - This creates a “channel” for your new bead and makes cleanup easier.
Prepare the caulk tube
- Cut the tip at a 45-degree angle, starting with a small opening. - Puncture any inner seal if needed (many caulk guns have a built-in puncture wire).
Apply a steady bead
- Hold the gun at about a 45-degree angle and slowly squeeze the trigger while moving along the joint. - Aim for a continuous bead rather than starting and stopping frequently.
Smooth the caulk
- Dip your finger in soapy water or use a caulking tool. - Gently press and pull along the bead to smooth it and push it into the gap. - Wipe off extra caulk from your finger or tool as you go.
Remove the tape (if used)
- Pull the tape away slowly while the caulk is still wet, pulling at a 45-degree angle away from the bead. - This leaves a clean, crisp line.
Let it cure
Check the label for dry and cure times. Avoid getting the area wet until the caulk is fully set.
A clean, fresh caulk line makes your sink area look newer and keeps moisture exactly where it belongs.
Conclusion
You don’t need a full workshop, a big budget, or a “handy” background to start taking control of nagging home issues. Each of these fixes—silencing a drip, steadying furniture, quieting a door, patching a wall, or re-caulking a sink—builds both a more comfortable home and your confidence.
Start with the one that bothers you most. Lay out what you need, follow the steps, and give yourself credit when it’s done. The more small wins you collect, the easier it becomes to tackle the next thing on your list.
Sources
- [U.S. Environmental Protection Agency – Fix a Leak](https://www.epa.gov/watersense/fix-leak-week) - Explains the impact of household leaks and basic steps to address them
- [Family Handyman – How to Fix a Leaking Faucet](https://www.familyhandyman.com/project/how-to-fix-a-leaky-faucet/) - Detailed guidance with photos on common faucet repairs
- [This Old House – How to Re-Caulk a Bathtub or Shower](https://www.thisoldhouse.com/plumbing/21017631/how-to-caulk-a-bathtub) - Step-by-step caulking tutorial applicable to sinks and countertops
- [Lowe’s – How to Repair Drywall](https://www.lowes.com/n/how-to/repair-drywall) - Covers patching small nail holes and larger wall repairs
- [Home Depot – How to Fix a Squeaky Door](https://www.homedepot.com/c/ah/how-to-fix-a-squeaky-door/9ba683603be9fa5395fab9010f3b6dd) - Simple methods and product options for quieting door hinges