Below are five simple DIY resets you can do today. Pick one, follow the steps, and give yourself credit for every small win.
1. Five-Minute Entryway Reset With a “Landing Zone”
The entryway is where clutter first explodes: keys, bags, random mail, sunglasses. A simple landing zone turns that chaos into something you can control.
You’ll need:
- Small tray, shallow basket, or old baking dish
- Hook (adhesive, over-the-door, or screw-in)
- Small box, envelope, or folder for mail
- Optional: small jar/cup for pens and spare change
Step-by-step:
Clear a tiny space:
Choose a spot near your main door: a shelf, a side table, or even the top of a shoe rack. Clear just that one surface.
Add a tray or basket:
Place the tray or shallow basket in the center. This is now the “keys/phone/sunglasses” drop zone—no more wandering items.
Create a simple hook station:
Install one or two hooks near the door for your everyday bag and a jacket. If you’re renting, adhesive hooks or over-the-door hooks work well.
Tame the mail avalanche:
Put a small box, sturdy envelope, or folder right beside the tray. Label it “Mail to open” or “Bills/Important.” All incoming paper lands here, not on every surface in your home.
Add a small “catch-all” jar:
Drop in stray coins, a pen, or that one screwdriver you always need for batteries. This becomes your quick-grab mini toolkit.
Keep it going:
Give yourself one simple rule: when you walk in, everything in your hands goes into the landing zone first. No judgment, just one easy habit.
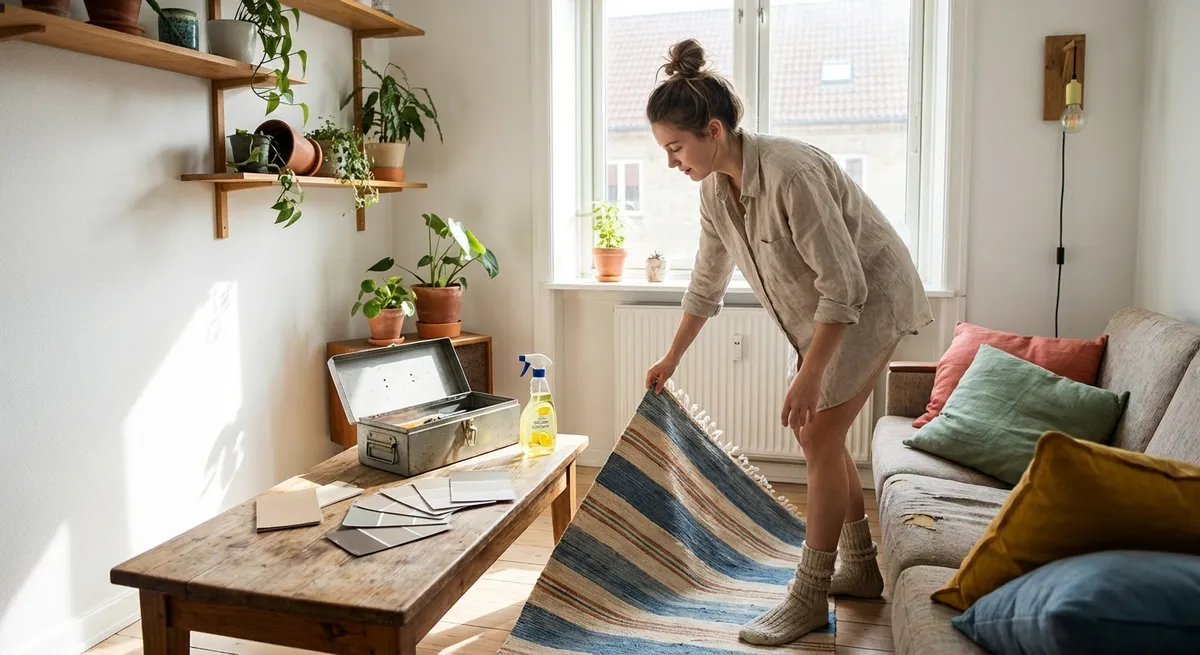
2. Speed-Refresh Your Bathroom With a DIY Cleaning Caddy
A messy bathroom can make a whole home feel off. Having a dedicated, grab-and-go cleaning caddy makes quick cleanups much less overwhelming.
You’ll need:
- Small bucket, tote, or old shoebox
- All-purpose cleaner (store-bought or DIY, see below)
- Glass cleaner or vinegar/water solution
- Microfiber cloth or old t-shirts cut into rags
- Scrub brush or old toothbrush
- Rubber gloves (optional)
Step-by-step:
Choose your container:
Grab a small bin, tote, or even a sturdy cardboard box that’s easy to carry and tuck under a sink.
Mix a simple DIY surface cleaner (optional):
In a spray bottle, combine: - 1 cup water - 1 cup white vinegar - A few drops of dish soap This works for counters, sinks, and many tiles. (Avoid vinegar on natural stone like marble or granite.)
Assemble your essentials:
Place your cleaner, glass cleaner (or a mix of 1 part vinegar to 2 parts water), rags, and brush inside the container. Keep it light so it’s not a chore to move.
Create a “15-minute routine”:
Once your caddy is stocked, do this quick sequence: - Spray sink, counter, and toilet exterior. - Let sit while you wipe mirrors. - Wipe sink/counter, then toilet exterior from cleanest (tank) to dirtiest (base). - Quick swipe of fixtures to make them shine.
Store it smart:
Keep the caddy in the bathroom or very close by so you can grab it without thinking. Out of sight but easy to reach is the goal.
Keep it going:
Aim for a fast, 5–10 minute mini-clean every few days instead of a huge deep clean that you dread. Even one quick pass per week is a win.
3. Cable Chaos Fix: Simple DIY Cord Organizer From What You Have
Tangled cords around your desk or TV area are frustrating and, honestly, a bit of a tripping hazard. You can organize them with things you probably already own.
You’ll need:
- Binder clips, twist ties, or Velcro straps
- Empty toilet paper roll or small cardboard tubes
- Masking tape or painter’s tape
- Marker or pen
Step-by-step:
Unplug and untangle:
Turn off your power strip, then unplug everything in one area (desk or TV). Gently untangle the cords and lay them out in a line.
Label your cords:
Tear off small strips of masking tape and wrap one around each cord near the plug. Write what it is: “Lamp,” “Monitor,” “TV,” “Charger.” This saves you from random unplugging later.
Bundle extra length:
For each cord that’s too long: - Fold the extra length into a loose loop. - Secure it with a twist tie, Velcro strap, or binder clip handle. - Avoid tight wrapping to prevent damage—aim for gentle loops.
Create a simple “cord corral”:
Use an empty toilet paper roll or cardboard tube. Feed coiled cables (phone chargers, earbuds, etc.) through the tube. Label the outside, e.g., “Phone chargers” or “HDMI.”
Clip cords where you actually use them:
Attach binder clips to the edge of your desk with the metal loops facing outward. Thread frequently-used cords (like phone chargers) through the loops to keep them from sliding to the floor.
Keep it going:
Whenever you add a new device, label its cord right away. Future you will be very grateful.
4. Instant Closet Breathing Room With a “Wear or Let Go” Rail
Closets fill up slowly until one day they’re impossible to manage. Instead of a full purge, set up a simple system that helps you decide what really earns space.
You’ll need:
- 10–15 hangers
- Small piece of tape or ribbon
- A bit of space on your closet rod or a hook on the back of a door
Step-by-step:
Choose your “test section”:
On your closet rod, mark off a small area at one end with a piece of tape or ribbon. This is your “wear or let go” zone.
Move a limited number of items:
Pick 10–15 items you think you want to wear more (tops, dresses, or pants). Hang them in this section with the hangers facing the opposite direction of the rest of your clothes.
Make a simple rule:
Over the next month, every time you wear and wash an item, return it to the closet with the hanger facing the “normal” direction. If something stays backwards after 30 days, that’s a sign you might not actually need it.
Check for quick repairs:
As you move items into the test section, look for: - Missing buttons - Loose hems - Small tears Set aside a tiny “mending bag” so you can fix them in one TV-watching session.
Decide without guilt:
After a month, anything still facing the “wrong” way is a candidate for donation or recycling. You don’t have to get rid of everything—but this gives you a clear, honest picture of what you actually use.
Keep it going:
Repeat the process each season with a new batch of clothes. You’ll gradually slim down to what you like, wear, and can maintain.
5. DIY “Calm Corner” Using Only What You Already Own
When the day gets loud, having a small, intentionally set-up spot to breathe or read can make your whole home feel more supportive—even if it’s just one chair in a corner.
You’ll need:
- A comfortable chair, floor cushion, or folded blanket
- Small table, crate, or stool
- A light source (lamp, clip light, or candles if safe)
- One or two calming items: book, journal, plant, or photo
Step-by-step:
Pick a low-traffic corner:
Look for a spot by a window, in a bedroom corner, or near a quiet wall. You don’t need a lot of space—just enough for sitting and a small surface.
Set up your seat:
Place a chair, floor cushion, or stack of folded blankets there. Test it—you should be able to sit comfortably for at least 10 minutes.
Add a surface for essentials:
Use a small table, sturdy box, or upside-down crate as a mini side table. This holds a cup of tea, a book, or your phone (if you’re listening to something calming).
Choose a gentle light source:
Add a lamp, clip light, or string lights. Aim for softer, warmer light if possible. If you use candles, follow fire safety guidelines and never leave them unattended.
Limit the objects you include:
Place only a few items: - One book you actually want to read - A notebook and pen for brain-dumping - A small plant, photo, or object that makes you feel calm
Keep it going:
Give yourself permission to use this spot for just 5 minutes at a time. No tasks, no expectations—just a small daily reset you’ve intentionally built.
Conclusion
You don’t need a full renovation or a truckload of supplies to feel more in control of your home. A landing zone at your door, a simple bathroom caddy, tamed cables, a mini closet system, and a tiny calm corner are all realistic, finishable projects that make everyday life noticeably easier.
Pick one fix from this list and complete it today, even if it’s not perfect. Small DIY wins stack up quickly—and each one is proof that you can shape your space to support the life you actually want to live.
Sources
- [Centers for Disease Control and Prevention: Cleaning and Disinfecting Your Home](https://www.cdc.gov/hygiene/cleaning/index.html) - Guidance on safe and effective cleaning practices at home
- [U.S. Environmental Protection Agency: Safer Choice](https://www.epa.gov/saferchoice) - Information on safer cleaning products and ingredients for DIY cleaners
- [Mayo Clinic: Stress Management](https://www.mayoclinic.org/healthy-lifestyle/stress-management/in-depth/relaxation-technique/art-20045368) - Explains how creating relaxing routines and spaces can help manage stress
- [Consumer Product Safety Commission](https://www.cpsc.gov/Safety-Education/Safety-Guides/Home) - Home safety tips, including guidance relevant to cords, fire hazards, and safe setups
- [Harvard T.H. Chan School of Public Health: Healthy Home](https://www.hsph.harvard.edu/healthybuildings/healthyhomes/) - Research-backed insights on how home environments affect health and wellbeing