Before You Start: Simple Safety & Setup
A few minutes of prep makes every DIY fix smoother and safer.
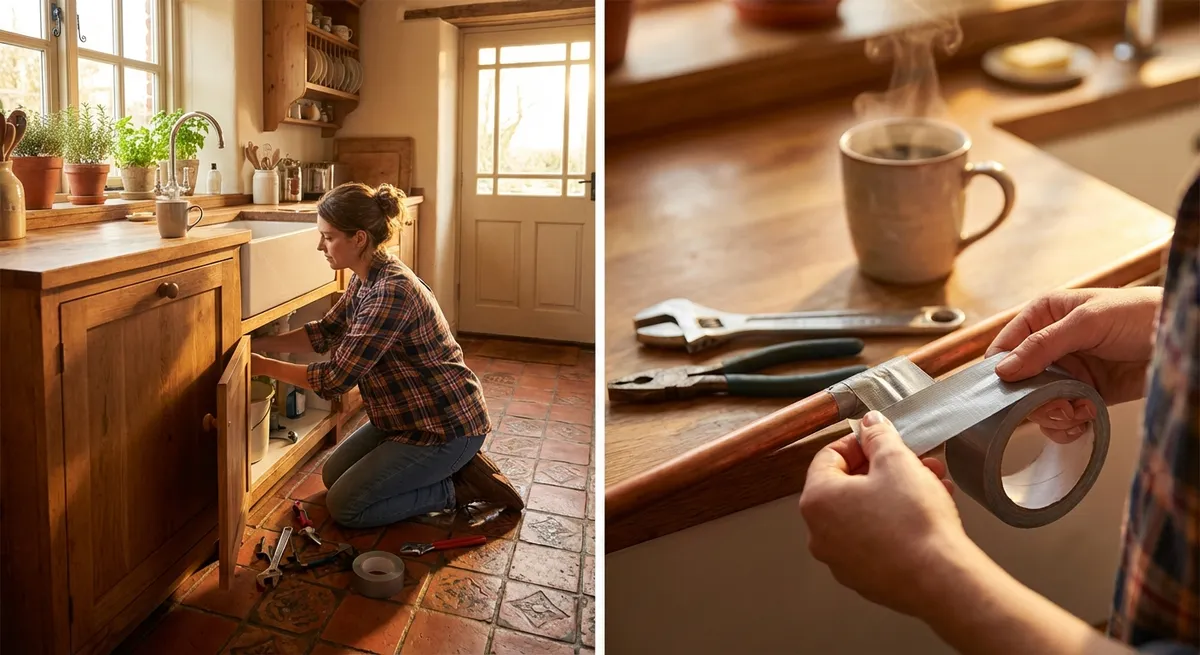
First, gather a basic “mini kit” you can keep in a drawer or small box: a multipurpose screwdriver (flathead and Phillips), a small adjustable wrench, painter’s tape or masking tape, super glue, white vinegar, baking soda, a microfiber cloth, and a flashlight. You don’t need top-of-the-line tools—just reliable basics.
Whenever you’re dealing with anything electrical (like outlets, light switches, or lamps), turn off the power at the switch or unplug the device. If you’re working near water and electricity together (like a bathroom vanity light), turn off power at the breaker to be extra safe. For any fix involving water, find your shutoff valve first so you’re not scrambling if something leaks more than expected.
Work in good light so you can see screws and parts clearly. Keep a small container or cup nearby to hold tiny screws or washers so they don’t vanish under the furniture. Move slowly, take pictures with your phone before you take something apart, and don’t force anything that doesn’t want to move—gentle pressure is almost always enough for these beginner-friendly fixes.
Quick Fix #1: Stop a Door from Squeaking (Without Fancy Tools)
A squeaky door can make your whole home feel creaky, but you can usually quiet it in minutes.
- Identify the squeak. Slowly open and close the door and listen. The sound almost always comes from the hinges.
- Choose a lubricant. If you don’t have a dedicated lubricant like WD-40, try a little petroleum jelly, bar soap, or even a few drops of cooking oil as a temporary fix.
- Protect the area. Place an old towel or paper towel under the hinge to catch drips and protect the floor or trim.
- Apply to the hinge.
- If using a spray lubricant: Insert the straw (if it has one) and give a short, controlled spray at the hinge pin and where the parts move.
- If using jelly, soap, or oil: Dip a cotton swab or tissue in it and rub directly onto the hinge joints.
- Work it in. Open and close the door 10–15 times so the lubricant spreads evenly inside the hinge.
- Wipe away excess. Use a clean cloth to remove drips so they don’t stain nearby surfaces.
If the squeak lingers, repeat the steps or apply from a slightly different angle. Most squeaks give up after one or two rounds, and you’ll instantly notice the difference every time you use the door.
Quick Fix #2: Tighten a Wobbly Chair or Table
That shaky chair or teetering side table isn’t necessarily trash—it usually just needs a few snug screws.
- Flip and inspect. Carefully turn the furniture upside down or on its side. Gently wiggle each leg and joint to see where the movement is coming from.
- Locate the hardware. Look for screws, bolts, or brackets where the legs meet the seat or tabletop. If you see metal plates or braces, check those too.
- Match your tool.
- For screws with a cross-shaped slot, use a Phillips screwdriver.
- For flat, straight slots, use a flathead screwdriver.
- For nuts and bolts, use a small adjustable wrench.
- Tighten gradually. Turn each screw or bolt a little at a time instead of cranking one all the way before touching the others. Working around in a “circle” keeps the tension more even and reduces the risk of cracking wood.
- Add extra grip (optional).
- If a screw just spins and won’t tighten, remove it and insert a small piece of wooden toothpick or matchstick (no head, no flame) into the hole with a drop of wood glue. Reinsert the screw and tighten gently.
- For small gaps in joints, a dab of wood glue, then clamping with tape or a strap while it dries, can help solidify the connection.
- Test on a flat surface. Place the furniture back upright on a hard floor, sit or press down lightly, and rock it gently. If there’s still wobble, re-check the same points and give one more small turn where needed.
This kind of fix can extend the life of furniture for years and builds your confidence with tools in a low-risk way.
Quick Fix #3: Clear a Slow-Draining Sink with Kitchen Staples
A slow sink is annoying, but you can often clear it without harsh chemicals.
- Remove visible debris. Take out the drain plug or stopper if possible. Use a paper towel or gloved hand to pull out hair, food scraps, or built-up gunk you can easily reach.
- Pour hot (not boiling) water. Run the tap on the hottest setting for a minute, or heat water until very hot but not rapidly boiling. Slowly pour down the drain to soften buildup.
- Try a baking soda and vinegar flush.
- Pour about 1/2 cup of baking soda directly into the drain.
- Follow with about 1/2 cup of white vinegar.
- You’ll hear fizzing—that’s normal and helpful.
- Let it sit. Cover the drain with a plug or small plate and wait 10–15 minutes so the reaction can work on grime.
- Flush again with hot water. Run hot tap water for a few minutes, or slowly pour another kettle of very hot water down the drain.
- Test the flow. Fill the sink an inch or two and then let it drain. If it’s still slow, repeat the process once more or gently use a plunger just for sinks (not the one used for toilets).
Avoid using multiple different chemical drain cleaners in a row—they can react with each other and be unsafe. If water stops draining altogether or backs up into other fixtures, that’s the point to call in a professional.
Quick Fix #4: Patch a Small Wall Nail Hole So It Nearly Disappears
Those tiny holes left behind from picture hooks can make walls look tired, but patching them is quick and beginner-friendly.
- Clean the area. Wipe gently with a dry cloth to remove dust or loose paint flakes. For shiny or glossy paint, a light wipe with a barely damp cloth helps.
- Choose your filler. For small nail holes, premixed lightweight spackle, wall repair putty sticks, or even white toothpaste as a temporary fix will do in a pinch. Spackle or putty is more durable, though.
- Apply the filler.
- Use a putty knife, plastic card, or even a clean fingertip.
- Press the filler into the hole, then scrape or wipe across the surface to smooth it out and remove excess.
- Let it dry. Follow the product directions. Most lightweight spackles dry in 15–30 minutes for small holes; toothpaste may take longer to fully harden.
- Lightly sand (optional). If you have fine sandpaper (220 grit or so), gently sand the spot until it’s flush with the wall. If you don’t, use a dry paper towel or cloth to buff down any rough bits.
- Touch up with paint. Dab matching wall paint over the patch with a small brush, cotton swab, or foam applicator. Feather the edges so it blends. If you don’t have the exact paint, choose a small sample pot from the hardware store that’s as close as possible to your wall color.
For renters, this kind of small patching is often expected—and doing it neatly can make move-out much less stressful.
Quick Fix #5: Secure a Lifting Corner of Peel-and-Stick Flooring or Tile
Peel-and-stick tiles and planks are great… until a corner starts catching on socks or cleaning tools. You can often re-adhere them without replacing the whole piece.
- Clean under the loose edge. Gently lift the lifting corner just enough to see underneath. Use a dry cloth or soft brush to remove dust, crumbs, or grit—these prevent adhesion.
- Dry the area thoroughly. If there’s any moisture, dry it completely with a cloth and let air-dry for a bit. Adhesives stick best to clean, dry surfaces.
- Add extra adhesive if needed.
- For a small corner: Use a few dots of strong double-sided tape or a thin smear of construction adhesive meant for flooring.
- For a longer edge: A thin, even line of flooring adhesive spread with a toothpick or cotton swab can help.
- Press firmly into place. Push the tile or plank back down, starting at the stuck side and moving toward the lifted edge so air doesn’t get trapped.
- Weight it down. Place a heavy book, stacked tiles, or a flat board with something heavy on top over the area. Leave it for several hours or overnight so the adhesive sets well.
- Check the edges. After removing the weight, run your hand along the edges to check for any remaining lift. If needed, repeat with a little more adhesive just at the stubborn point.
Avoid using large amounts of wet glue that can ooze out and become visible. Thin, targeted application is your friend here.
Conclusion
Small DIY wins add up. Every squeak you silence, wobble you stabilize, or clog you clear is proof that you’re capable of handling more around your home than you might think. Start with one quick fix from this list the next time something minor bugs you. As you practice, you’ll get faster, more confident, and better at spotting simple solutions before problems grow.
You don’t need to “know everything” to get started—you just need to be willing to try, move slowly, and learn as you go. Your home doesn’t have to be perfect; it just has to work better for you, one small fix at a time.
Sources
- [Consumer Product Safety Commission – Home Electrical Safety Checklist](https://www.cpsc.gov/safety-education/safety-guides/electrical/home-electrical-safety-checklist) - Practical guidance on basic electrical safety around the home
- [U.S. Department of Energy – Air Leaks and Drafts](https://www.energy.gov/energysaver/weatherize/air-sealing-your-home/air-leaks-and-drafts) - Background on how small gaps and issues (like around doors) affect comfort and energy use
- [Mayo Clinic – Household Chemical Safety](https://www.mayoclinic.org/healthy-lifestyle/adult-health/in-depth/household-chemicals/art-20046494) - Important information on safely using and combining household products like cleaners
- [University of Kentucky Cooperative Extension – Home Maintenance Basics](https://extension.ca.uky.edu/files/homemaintenance.pdf) - Educational overview of simple home maintenance tasks and why they matter
- [Lowe’s – How to Patch and Repair Drywall](https://www.lowes.com/n/how-to/patch-repair-drywall) - Step-by-step guide with visuals for repairing small wall holes and dents